

Cyseekin C20 Display Guide: Screen, Symbols, and Error Codes Explained Simply
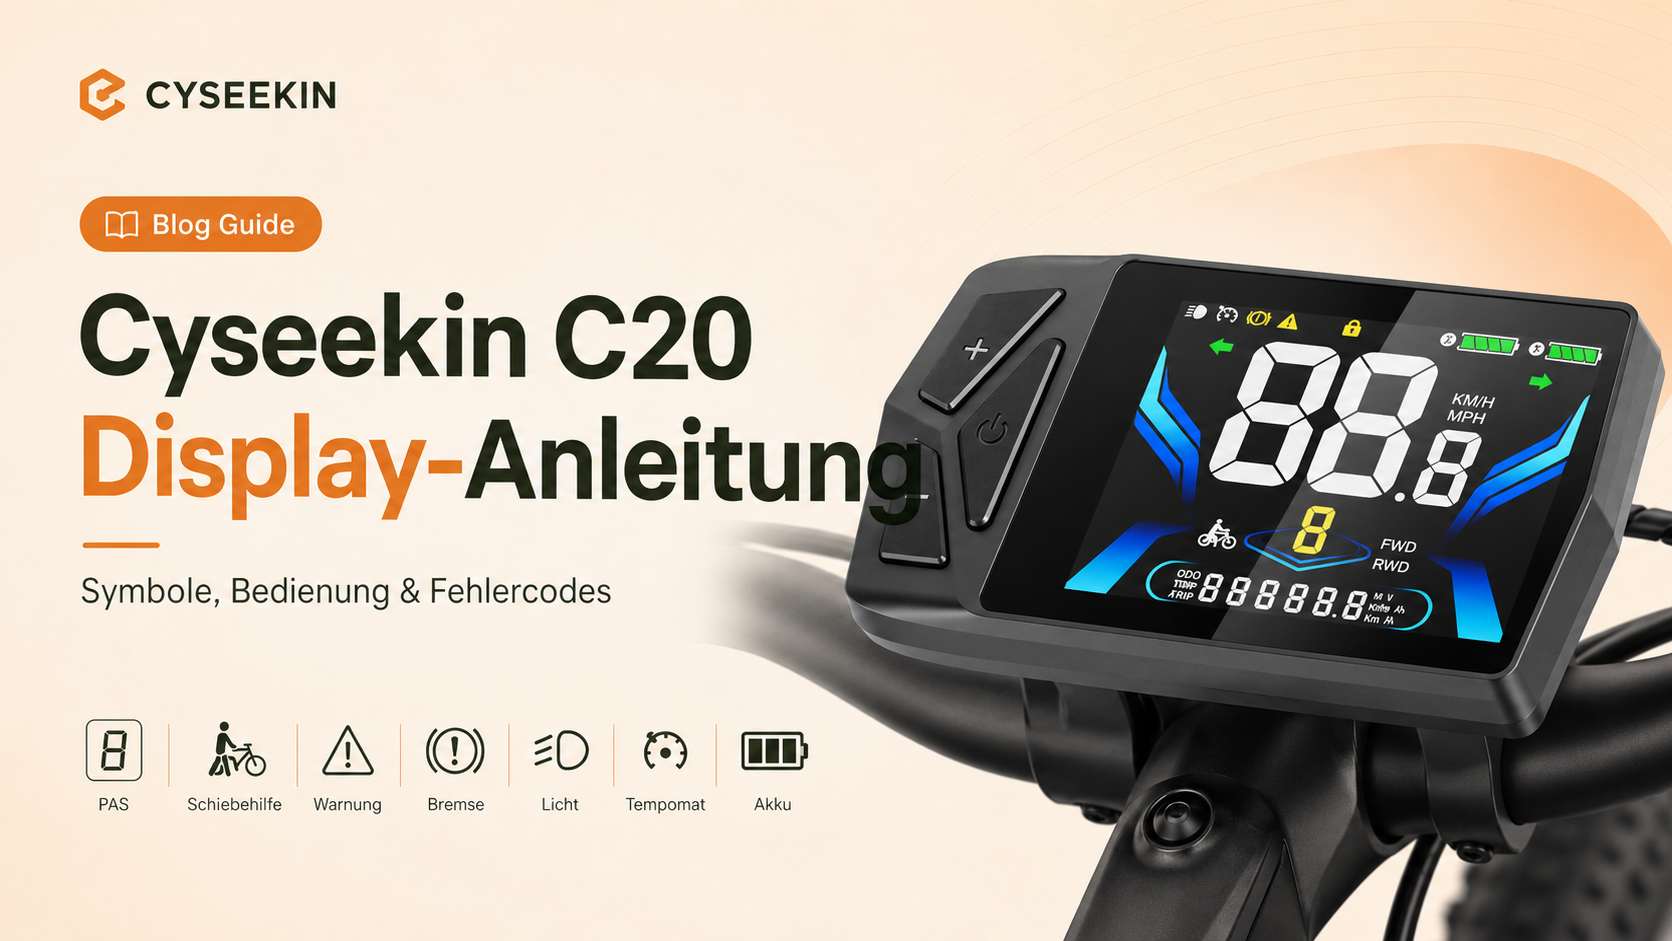
Your Cyseekin C20 displays important information such as battery level, speed, assistance level, riding data, and possible error codes. In this guide, we explain the key functions step by step.
1. Overview: What Does the C20 Display Show?
During a ride, the main screen shows the most important information at a glance. This includes the current speed, battery level, assistance level, and various riding data.

2. Key Display Symbols
The following symbols help you better understand your e-bike's current status.


3. Buttons on the C20 Display
The C20 display is operated using three buttons: the Power button, Plus button, and Minus button. They allow you to switch the display on and off, change riding data, and adjust the assistance level.

| Button | Function | Typical use |
|---|---|---|
| Power button | Switch the power on and off and change riding data | Start the display and show information such as distance or total mileage |
| Plus button | Increase assistance level | More assistance on inclines, in headwinds, or with heavy loads |
| Minus button | Decrease the assistance level, activate walk assist | Save battery power or assist with pushing the bicycle |
4. Switching the display on and off
- Press and hold the Power button for a few seconds to switch on the display.
- After switching on, the screen displays speed, battery level, and other information.
- To switch off the display, press and hold the Power button again for a few seconds.
5. Viewing riding data
Briefly press the Power button to switch between different riding information. Depending on the software version, the following data may be displayed:
| Display | Meaning |
|---|---|
| Trip | Daily distance or current trip distance |
| AVG | Average speed |
| Vol | Battery voltage |
| ODO | Total distance travelled by the bicycle |
6. Using the assistance levels correctly
Use the Plus and Minus buttons to adjust the assistance level. A low level is suitable for relaxed rides and conserving energy. A higher level can be helpful on inclines, in headwinds, or with additional load.

7. Activating walk assist
Walk assist supports you when you need to push the e-bike, for example up a ramp, in an underground car park, or along a short steep section.
- Make sure the bicycle is stationary or moving very slowly.
- Press and hold the Minus button.
- The walk-assist symbol appears on the display.
- Release the Minus button to end walk assist.
8. Lighting
The C20's lighting is controlled using the corresponding light switch. Depending on the version, a light symbol may be shown on the display.
If the light does not work as expected, first check that the battery is sufficiently charged and that all visible cable connections are properly seated.
9. Display settings
The display has a settings menu. This menu is primarily intended for basic display settings, such as switching between kilometres and miles.
10. Understanding error codes
When the display detects a fault, an error code appears. This code helps narrow down the problem more quickly.
| Error code | Possible meaning | Recommended initial check |
|---|---|---|
| E01 | Possible motor phase error | Turn off the e-bike and check the visible cable connections |
| E04 | Communication error | Check the plug connections between the display, controller, and wiring harness |
| E08 | Overvoltage protection | Check the battery and system again after restarting |
| E10 | Possible controller error | Restart the system and document the error display |
| E20 | Possible switch or control element error | Check the brake levers, switches, and cable connections |
| E40 | Possible motor Hall sensor error | Check the motor connection and contact Support |
- Turn off the e-bike.
- Check that all visible cable connections are firmly seated.
- Turn the e-bike on again.
- If the error is still displayed, please take a photo or short video of the display.
- Send the error code and the recording to Cyseekin Support.
11. Display care instructions
| Recommendation | Why is this important? |
|---|---|
| Clean with a soft, slightly damp cloth | Protects the display surface |
| Do not aim a strong jet of water directly at the display | Reduces the risk of moisture damage |
| Do not disconnect cables while the system is switched on | Protects electronic components |
| Do not change advanced parameters without consulting support | Prevents malfunctions caused by incorrect settings |
Share:
Why the e-bike is often more efficient than the car for short distances
E-Bike and Bicycle Deals: How to Find Reliable E-Bikes with Great Value for Money
2 comments
I saw an interesting post in the Cyseekin community about adjusting the C20 speed limit settings:
https://cyseekinbike.com/en/pages/cyseekin-hilfe-community#post-1b865e58-004d-44da-b2b5-adf8fca1b837
This could be useful for C20 riders who feel that 25 km/h is not always enough when riding with faster friends or in a group. With the right settings, it may be easier to keep up without too much effort.
Of course, everyone should always follow their local laws and regulations. In many EU countries, including Germany, Pedelecs are only allowed to provide motor assistance up to 25 km/h on public roads.
Still, it is helpful to know that these settings can be checked and understood more clearly.
Vielen Dank für diese ausführliche Erklärung.
Ich finde den Beitrag sehr hilfreich, besonders für die Bedienung des C20 Displays. Einige Funktionen wie Licht, Blinker, Unterstützungsstufen oder Geschwindigkeitseinstellungen sind am Anfang nicht sofort verständlich.
Es wäre meiner Meinung nach gut, wenn solche wichtigen Grundfunktionen auch direkt in der Bedienungsanleitung noch klarer und Schritt für Schritt erklärt werden könnten.
Der Blog hilft aber auf jeden Fall weiter und ist eine gute Ergänzung zur Anleitung.