

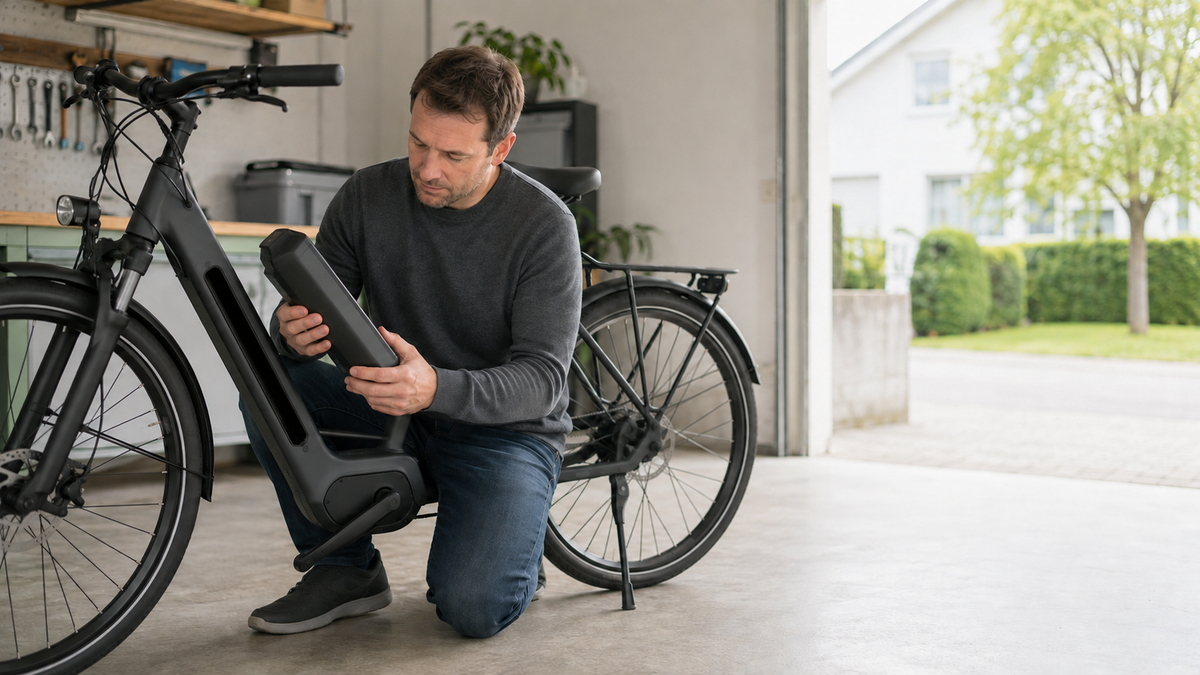
You connect the charger, but the indicator remains dark or the e-bike battery no longer charges fully. This may be due to a simple connection issue, the temperature, the charger, or the battery itself. Because the housing contains lithium-ion cells and a protection circuit, opening it without a plan is not an option. By following a safe sequence, you can narrow down external causes, document your observations, and decide when the dealer or manufacturer needs to take over.
Stop immediately if you notice these signs
Only disconnect the charger from the mains safely if the battery and cable look normal and there is neither smoke nor unusual heat. In the event of a pungent smell, hissing, smoke, leaking liquid, severe swelling, obvious deformation, or unusual heat, keep your distance, warn others, and call 112 in an acute emergency. Do not move, open, or cool a suspicious battery on your own.
The battery must remain out of service even after a fall, crushing, water ingress, or a damaged charging port. Do not continue using it as a test. Shimano lists an unusual smell, smoke, leakage, and significant heating as clear reasons to stop using it and contact a point of sale. The specific return of a defective battery must be coordinated with the dealer or local authority; it must never be disposed of with household waste.
First determine the exact system
The battery, charger, adapter, and bike form a coordinated system. Check the model designation and manual without sharing serial numbers publicly. Use only the charger approved by the manufacturer for this battery and the specified adapter. Matching plug shapes do not prove electrical compatibility. A third-party or damaged charger can bypass safety functions, damage contacts, or cause a fire.
The connection sequence and the meaning of the LEDs vary depending on the system. Therefore, follow the current original manual rather than a universal rule from the internet. Note whether you are charging directly at the removed battery, via the socket on the bike, or via an adapter. This information will help narrow down the cause later.
Safe troubleshooting sequence when charging does not start
- Stop the attempt if the housing, cable, plug, or socket appears damaged.
- Compare the battery, charger, and adapter with the approved system combination.
- Check whether the outlet being used works with another suitable device.
- Leave a very cold or warm battery switched off in a dry indoor area until it reaches the permitted temperature range.
- Visually check the socket and plug only for moisture, dirt, or bent contacts.
- Connect everything exactly in the order specified in the manufacturer's manual and observe the display.
- Document the LED behavior, state of charge, temperature conditions, and preceding events.
What the observation can help narrow down
| Observation | Possible direction | Safe next step |
|---|---|---|
| Charger remains completely dark | Outlet, power cable, charger, or system-dependent normal behavior | Check the original manual and a functioning outlet |
| Display responds, but charging does not start | Connection, temperature, battery protection function | Acclimatize, visually check when dry, and note the symptoms |
| Charging repeatedly stops | Loose connection, heat, charger, or battery | Do not move it by the cable; arrange a dealer diagnosis |
| Battery no longer reaches its previous displayed level | Temperature, calibration, aging, or defect | Measurement and system diagnostics instead of deep discharge |
| Odor, heat, smoke, or deformation | Possible dangerous battery damage | Keep your distance, do not use it again, call 112 in an emergency |
Check the outlet and charger without improvising
A switched power strip, a loose wall outlet, or a mains plug that is not fully inserted can interrupt the power supply. Test the outlet only with a suitable, undamaged household appliance. Do not use a cascade of multiple adapters or an extension cord with visible damage. The charger should be kept uncovered, remain dry, and be able to dissipate its heat.
Check the cable and housing with the mains plug disconnected. Kinks, crushing, exposed conductors, loose plugs, or burn marks mean: do not continue using it. Do not open a charger or combine it with another power supply. Even a seemingly compatible replacement must be explicitly approved for the battery and region.
Account for temperature and condensation correctly
Many batteries prevent charging outside their permitted temperature range. The exact range is specified in the system manual and is not the same for all manufacturers. If the battery came from a freezing garage, a hot car, or direct sunlight, leave it switched off in a dry, well-ventilated indoor area and allow it to acclimatize slowly. Do not place it on a radiator or cooling pack.

Condensation can form after moving from cold to warm. Do not connect the battery until the surface and connection are dry and the waiting time required by the manufacturer has been observed. A battery that still does not charge after normal temperature acclimatization does not need a series of forced attempts, but a diagnosis.
Only inspect the connections; do not alter them
Shine a light into the charging socket and plug without touching the contacts. Look for water, foreign objects, corrosion, melted plastic, or bent pins. Do not insert a needle, brush, or metal tool, and do not spray contact cleaner on speculation. Short circuits, damage, and residue could result.
If the battery is mounted in the bicycle, check that it is fully engaged and locked according to the instructions. Do not use force. If the plug does not fit easily and unambiguously, stop. A damaged connection should be handled by a specialist workshop. Photograph it in good light; a close-up can help the service team but does not replace an electrical inspection.
Battery no longer charges fully: aging or a fault?
Available capacity gradually decreases with use. Nevertheless, a change in range does not prove that the battery is defective, because temperature, assistance level, tires, load, and route all play a role. What matters is whether charging ends normally according to the system display, stops unusually early, or shows an error message.
Do not repeatedly run the battery completely flat for “calibration” unless the manual explicitly requires it. Deep discharge can worsen its condition. A dealer diagnosis or manufacturer service can check the charger, battery, and system data separately. Some batteries at the end of their service life must be replaced and returned properly; opening or repairing cells yourself is not a safe solution.
Proceed systematically after winter
If the e-bike battery no longer charges after winter, document the storage location, approximate charge level when stored, and the date of the last inspection. A very low charge level over a long period can be problematic. Bring the battery into the permitted temperature range, inspect it externally, and attempt at most the normal charging process specified in the manual.
If there is still no response, do not repeat the connection attempt endlessly. Contact the dealer or manufacturer with the model, age, storage conditions, and LED observations. For the next storage period, a system-appropriate routine can help; the article Storing an e-bike battery covers the charge level, temperature, and a suitable storage location separately.
What the service team needs from you
Note the exact battery and charger model, purchase date, last successful charge, and the charging socket used. Describe whether an LED is on, flashing, or going out, without trying to guess what it means. Mention drops, moisture, unusual heat, and prolonged storage. Send serial numbers only through the private support channel provided by the supplier.
Do not transport a battery showing signs of a problem without prior notice. Contact the receiving center in advance to clarify how it should be handed over safely. Shipping is subject to special dangerous-goods requirements; do not pack and ship it on your own. A factual advance notice protects you and the service staff.
Frequently asked questions when an e-bike battery does not charge
Why is the LED on the charger staying off?
Depending on the system, this may be normal or indicate a lack of mains power, an incomplete connection, or a faulty charger. First check the original instructions and a working power outlet. Do not open the charger.
Can I use a different charger for testing?
Only if the manufacturer has specifically approved that charger for your battery. A matching connector is not enough. Dealers can use compatible testing equipment to determine whether the battery or charger is affected.
Can cold prevent charging?
Yes, protection systems can block charging outside the permitted temperature range. Let the battery acclimatize and dry slowly, and follow the specific instructions. Do not actively heat it.
Should I open a battery that is not responding?
No. High levels of energy are present inside the casing, and the cells can be dangerous even when switched off. Opening the casing, replacing cells, and improvised bridging are not part of user troubleshooting.
Conclusion: check the outside; leave the inside to the service team
If the e-bike battery does not charge, safe troubleshooting starts with its condition, system compatibility, the power outlet, temperature, and a dry visual inspection. LED patterns and circumstances are documented, not guessed. If charging does not start or the battery shows signs of damage, stop the attempt. This gives the service team useful information without you opening the battery or charger.
As of September 6, 2026. The charging sequence, indicators, temperature limits, and permitted components are determined by the instructions for the specific e-bike system.
Share:
Bike chain broken: Stop, inspect the damage, plan your way home
Bent derailleur hanger: Recognize the symptoms and protect the rear derailleur