

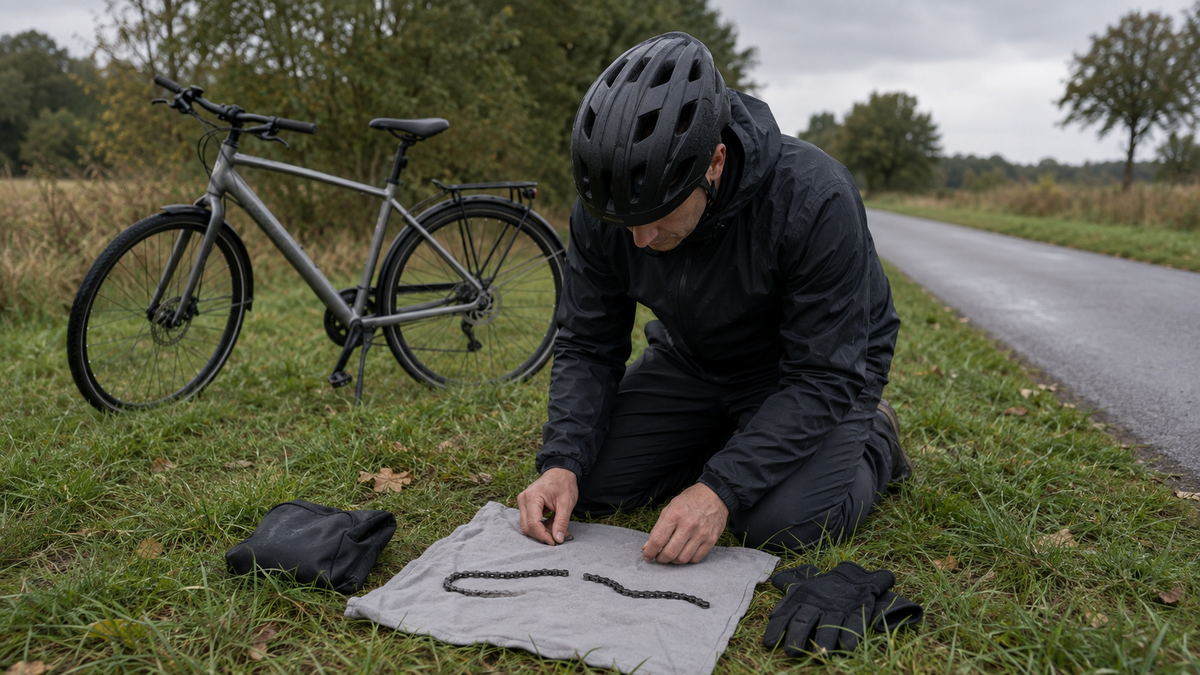
A pedal stroke suddenly gives way, there is a metallic noise, and the chain suddenly hangs from the bicycle: A broken bicycle chain initially brings the ride to an immediate stop. Continuing to pedal can pull the chain between the cassette and spokes, jam it against the frame, or cause additional drivetrain damage on an e-bike. What matters now is not the fastest repair, but a safe place to stop, a complete damage assessment, and a truly compatible connecting component.
Immediately after the chain breaks
Immediately take pressure off the pedal, keep the handlebars steady, and roll to a controlled stop. Brake gradually and leave the traffic lane at a place with good visibility. In heavy traffic, on a slope, or on unstable ground, focus only on stopping. Do not try to look down while riding or free the chain with your foot.
Switch off an e-bike completely. Park it securely and prevent it from rolling away. Touch the chain and sprockets only while wearing gloves, as broken plates and burrs can be sharp. If the chain is wrapped around the spokes, brake disc, motor sprocket, or crank, do not pull hard on it. It is only safe to push the bike once no loose section of chain can block a wheel.
Document the damage before removing anything
Photograph the chain’s position and, with the bicycle stationary, look for consequential damage. Check the derailleur and derailleur hanger, spokes, cassette, chainring, chain guard, and chainstay. On an e-bike, also inspect the outside for a damaged motor housing or cable without opening any covers. Bent teeth, cracked components, or a derailleur caught in the spokes mean arranging transport instead of continuing to ride.
Keep all loose parts in a bag. They will show the workshop whether a rivet, a connecting link, or a plate has failed. Do not clean the break completely before it has been documented. Rust, unusual wear, or a previous connection point may be important for analyzing the cause.
Repair or arrange a way home?
| Situation | Decision | Reason |
|---|---|---|
| Only one clearly defined chain link is damaged; the rest of the drivetrain appears normal | An experienced person can assess a compatible emergency repair | The fault is localized, but compatibility remains essential |
| Chain twisted or damaged in several places | Do not repair; arrange transport | Further weakened links may fail |
| Derailleur, derailleur hanger, or spokes affected | Do not ride or shift gears | Risk of blockage and consequential damage |
| Suitable quick link or tool is missing | Push the bike or arrange for pickup | Improvised connection is not load-bearing |
| Chain too short after shortening | Do not ride | Large gears can overload the derailleur and frame |
Why the correct connecting part is essential
Chains differ by drivetrain, width, number of gears, running direction, and manufacturer approval. A quick link that looks suitable may not be appropriate for the chain installed or for the load of an e-bike drivetrain. Use only an explicitly compatible, undamaged connecting part, and observe whether it is intended for one-time or multiple use.
Connecting rivets are also system-specific. Shimano advises against separating a chain again at a location already joined with a Quick-Link or reinforced connecting rivet. Park Tool recommends confirming connector compatibility with the component manufacturer for roadside repairs. These details matter more than the color or outward similarity of a quick link.

What a responsible emergency repair requires
An emergency repair is suitable only for people who are familiar with the chain type, tool, and instructions being used. The bicycle is stable, the drive system is de-energized, and damaged links have been fully identified. Removing a defective section requires a chain tool compatible with the chain; closing it requires the approved quick link or specified rivet.
- Compare the chain and connector markings and specifications with the documentation.
- Following the instructions, remove only bent, cracked, or twisted links.
- Insert the approved connector in the correct orientation and lock it using the specified method.
- Check each adjacent link for free movement, correct seating, and visible damage.
- Slowly turn the crank by hand without motor assistance while the bicycle is safely secured.
If you lack the instructions, practice, or compatible parts, skip these steps. A wire, cable tie, mismatched rivet, or laterally compressed plates is not a rideable repair. An incorrectly joined chain can break again under the first hard pedal stroke.
A chain that is too short may result after shortening
If a damaged section is removed, the chain will be shorter. With derailleur gears, it may then become too tight on large sprockets or a large chainring, putting strain on the derailleur, derailleur hanger, or frame. Do not test-shift into extreme combinations. Park Tool explicitly describes roadside repairs as a temporary solution; once you get home, a broken chain should be replaced and the entire drivetrain inspected.
If an experienced person has carried out a system-compatible emergency repair, perform only a test without high load on a traffic-free surface. The chain must run smoothly, the connector must be fully seated, and the derailleur must have sufficient movement reserve. If there is cracking, stiffness, misalignment, or uncertainty, walk the bike. Motor assistance and forceful acceleration increase the load and are not suitable tests.
Common causes of a broken chain
A chain rarely breaks without a prior cause. Severe wear, corrosion, damaged plates, an incorrectly installed connector, or a bent derailleur component may be involved. Shifting under high pedaling load can also create brief load spikes. On an e-bike, motor torque is added; therefore, you should briefly ease off the pedals before shifting whenever the riding situation allows.
- Wear: A stretched chain meshes less effectively with the sprockets and chainring.
- Corrosion: Rust can make the links stiff and damage the material.
- Installation error: An unsuitable rivet, an incompletely closed chain link, or an incorrect length.
- Foreign objects: A branch, clothing, or luggage strap can suddenly block the drivetrain.
- Misalignment: A bent derailleur hanger or derailleur guides the chain incorrectly.
What the workshop should check after a break
Installing only a new chain is not always sufficient. The workshop should check the cassette and chainring for worn or bent teeth, align the derailleur and derailleur hanger, assess the chainline, and look for marks on the frame. A heavily worn cassette can cause a new chain to skip under load. The article Bicycle Chain Skips Under Load explains this follow-up diagnosis.
Bring broken fragments, photos, and details about the incident: gear, incline, motor assistance, last chain service, and previous repairs. If the mileage is unusually low, the assembly history should also be checked. The break alone cannot reliably establish whether it was a material defect or user error.
Be properly prepared for your rides
A small kit can make the difference between a controlled emergency repair and a long walk: clean gloves, a suitable chain tool, an exactly approved quick link, and a small bag for parts. Before your ride, check that the chain tool fits the chain width and that you can operate it. A tool that merely sits in your luggage is no substitute for practice.
Save pickup options, workshop contacts, and a public transport alternative offline. Rules for taking bicycles on public transport vary depending on the transit network, train, and time of day; check them for the specific connection. If the chain is jammed, the bike may first need to be carefully freed before it can even be pushed. Force is not a shortcut.
Frequently asked questions about a broken bicycle chain
Can I continue riding the e-bike without a chain?
The motor assistance of a typical pedelec does not replace the mechanical drivetrain. In addition, a loose chain can block components. Switch off the system and arrange a safe solution.
Can a broken chain be repaired?
On the road, a temporary connection is possible in the event of localized damage and exact compatibility. The chain and drivetrain must then be professionally inspected; Park Tool recommends replacing the chain after a break.
Does every quick link fit the same number of gears?
No. Width, construction, direction of travel, reusability, and approval differ. The specifications from the chain and component manufacturers are decisive.
Can the cassette and chainring be damaged by the break?
Not necessarily, but it is possible. A jammed or worn link can put strain on the teeth, derailleur, spokes, and frame. That is why inspecting the entire drivetrain is important.
Conclusion: stop safely, prioritize compatibility over speed
If the bicycle chain breaks, first remove the load and motor assistance, stop safely, and check for consequential damage. Only an experienced person with the appropriate tools and an explicitly approved connector should consider an emergency repair. If there is more than one type of damage, compatibility is lacking, or the chain is too short, the bike must be pushed or transported. The chain and entire drivetrain should then be inspected.
As of September 6, 2026. The chain type, connector, joining point, and installation must follow the instructions for the specific drive system.
Share:
Bicycle hub has play: understanding wheel wobble
Bent derailleur hanger: Recognize the symptoms and protect the rear derailleur