

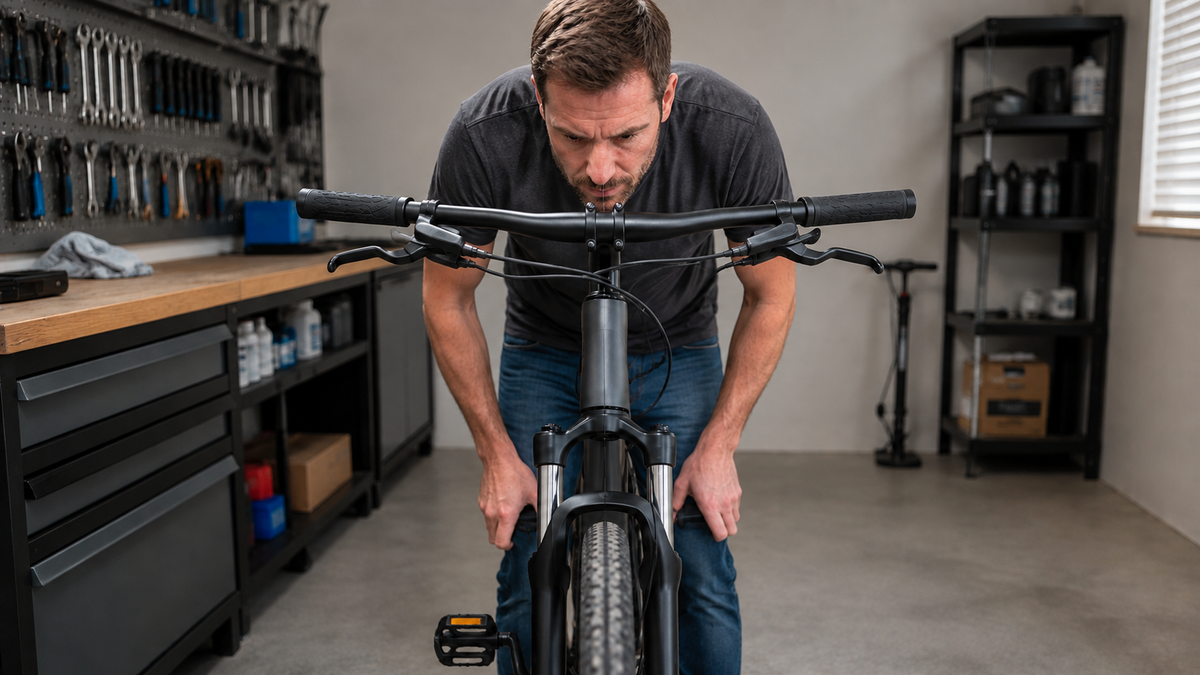
If the bicycle handlebar is crooked after a crash, “just twisting it back” is not a safe diagnosis. The stem may simply have twisted relative to the front wheel. However, a bent handlebar, damaged fork, displaced wheel, or crack at a clamping point is also possible. Therefore, do not continue riding until the cause and safety have been clearly established.
First, move yourself and the bike out of traffic. Switch off an e-bike and, if necessary, remove a readily removable battery only according to the manufacturer’s instructions. Photograph the cockpit, front wheel, and impact side before moving anything. These initial photos help identify small shifts and provide a workshop with important information.
What exactly does “crooked handlebar” mean?
The most common observation is that the front wheel points straight ahead, but the stem and handlebar are offset to one side. This suggests that the alignment between the stem and steerer tube has twisted, but it does not prove it. If the handlebar itself is higher on one side or its bend no longer appears symmetrical, the component may be bent or twisted in the stem clamp.
A wheel that is not centered in the fork, a misaligned tire, or a bent fork can create a similar appearance. Therefore, do not rely only on the mudguard or tire tread. Compare several fixed reference points: the front wheel rim, fork crown, stem, handlebar ends, and brake levers.
| Observation | Possible area | Safe response |
|---|---|---|
| Stem is not pointing toward the front wheel | Alignment at the steerer tube | Rule out damage, then align only according to the system instructions |
| Handlebar ends at different heights | Handlebar twisted or bent | Check clamp marks and symmetry; have it replaced if deformed |
| Steering catches or has indexed points | Headset, fork, or bearing | Do not ride; consult a specialist workshop |
| Rim is not centered in the fork | Wheel, axle mount, or fork | Have the mounting and components professionally inspected |
| Crack, fold, flaking, or whitish carbon spot | Structural damage | Do not load or straighten it |
Safety check after a crash
1. Inspect the impact contact points
Start with the grip, handlebar end, brake lever, and shifter assembly on the side that hit the ground. Scratches alone reveal little, but deep gouges, cracks, crushed material, or a displaced lever are warning signs. Then inspect the stem, spacers, headset, and fork. With carbon, matte spots, broken fibers, or an unusual edge can also be relevant.
The Trek bicycle guide recommends a thorough check after a fall and points out that damaged parts should not simply continue to be used. This applies regardless of the brand: hidden damage cannot be reliably ruled out with a short test ride.
2. Move the steering without riding
Stand beside the bike and slowly turn the handlebar through its normal range. The movement must be smooth. Catching, rubbing, creaking, or a cable suddenly becoming taut are stop signals. Apply both brakes and check that the levers, lines, and cables are neither damaged nor pulled out of their guides.

Hold the front brake and move the bike gently back and forth. Noticeable knocking may indicate play in the headset or another loose connection. You can find a detailed distinction in the article Checking headset play on a bicycle. After an impact, this test does not replace an inspection of the fork and frame.
3. Compare the front wheel and fork
Check that the front wheel is fully and straight in the dropouts and that its fastening is undamaged. Turn the wheel only if it can be lifted safely, and keep your hands and clothing away from the spokes and brake. Lateral wobble, tire contact, or a visibly misaligned fork are reasons not to continue riding.
Can you align the handlebar yourself?
Only if there is no damage, malfunction, or unidentified component and you can confidently identify the specific stem type. Modern Ahead stems and classic quill stems are adjusted differently. Integrated cockpits, carbon handlebars, and internal cables also require their own specifications. Never use a random online guide for an unknown system.
On an Ahead system, side clamping bolts secure the stem to the steerer tube; the top cap is generally used to preload the bearings and is not simply a “handlebar-tightening” bolt. An incorrect sequence can cause play, stiff steering, or inadequate clamping. The ROSE handlebar alignment guide explains the principle, but also refers to the appropriate torque and the final check.
If your bike's documentation authorizes users to carry out this work, loosen only the clamp bolts specified there, and only far enough to allow the stem to be aligned in a controlled manner. Do not clamp the front wheel between your knees or twist the cockpit by force. Visually center the stem and wheel, hold them in position, and tighten the bolts in the prescribed sequence to the specified torque.
With a quill stem, the minimum insertion depth, expander mechanism, and manufacturer's specifications must be observed. If it does not come loose with normal, suitable tools, a hammer must not be used to “correct” the crash damage. Corrosion or a damaged clamp should be handled by a workshop.
Handlebar twisted in the stem clamp
If the front wheel is aligned with the stem but the grip position or brake lever angle appears twisted, the handlebar may have moved in the stem's front clamp. First check the markings, gaps, and visible damage. Multi-part clamp plates often require a specific bolt sequence and even gaps. Without the instructions, this cannot be reliably determined from appearance alone.
Do not exceed any marking or torque specification. Carbon components in particular can be damaged by overtightening without breaking immediately. Our guide to the proper use of a torque wrench explains tool selection and reference to the manufacturer's specifications. It does not replace approval for the specific cockpit.
Final check before a short test ride
Stand in front of the bike and compare the front wheel, stem, and handlebar from the centerline. Then hold the front wheel firmly at the sides without putting pressure on the spokes or brake disc, and try to twist the handlebar with moderate force. There must be no relative movement. Check the steering range, brakes, gears, bell, and cable clearance while stationary.
A test ride is only advisable if all checks are satisfactory. Choose a flat, traffic-free area, ride slowly, and first test straight-line tracking and braking performance. Stop immediately if the bike pulls to one side, the steering responds unpredictably, anything creaks, or the alignment changes again. The Canyon inspection checklist emphasizes regular checks of safety-relevant components; after a crash, this attention is even more important.
When a workshop is essential
Do not continue riding if there are cracks, dents, deformation, damaged carbon, binding steering, headset play, a loose steerer tube, an improperly seated wheel, or impaired braking. The same applies if the handlebar moves again after being correctly aligned. In that case, transporting the bicycle without placing it under load is the safer choice.
Even without a visible crack, a professional inspection is advisable if the crash occurred at high speed, the front wheel was hit head-on, or the handlebar or fork struck something hard. Replacing a suspect component may be more sensible than trying to bend it back. Handlebars and stems are safety-critical and are not designed to be straightened improvisedly.
Frequently asked questions
Why is the handlebar perpendicular to the bicycle after a crash?
The stem may have twisted in relation to the steerer tube, but the fork, wheel, or clamp may also be damaged. Only a complete visual and functional inspection allows the situation to be assessed.
Can I clamp the front wheel between my legs and turn the handlebar?
This is not recommended. The method puts the bicycle, fork, and rider’s body under uncontrolled stress and does not check for damage. Follow the system-specific assembly sequence or consult a specialist workshop.
Does a scratched handlebar need to be replaced?
Not every superficial scratch automatically means replacement. However, deep notches, deformation, cracks, or signs of damage to carbon components must be professionally assessed. If in doubt, do not subject the component to further stress.
Is a straight test ride sufficient as a check?
No. A component may initially feel straight and still be damaged or insufficiently clamped. A visual inspection, secure fit, free steering, and fully functioning brakes come before any test ride.
Conclusion
A misaligned bicycle handlebar after a crash is initially an indication of possible damage, not merely an adjustment task. Check impact points, steering, the headset, front wheel, fork, and clamps. Only an undamaged, clearly identified system may be aligned according to the manufacturer’s instructions; if there is any uncertainty, do not ride the bicycle.
As of: September 6, 2026. This article does not replace a post-crash inspection or the bicycle or component manufacturer’s assembly instructions.
Share:
Bicycle lock jammed: lubricate the cylinder and avoid using force
Bike light flickering: Safely check the power source and contacts