

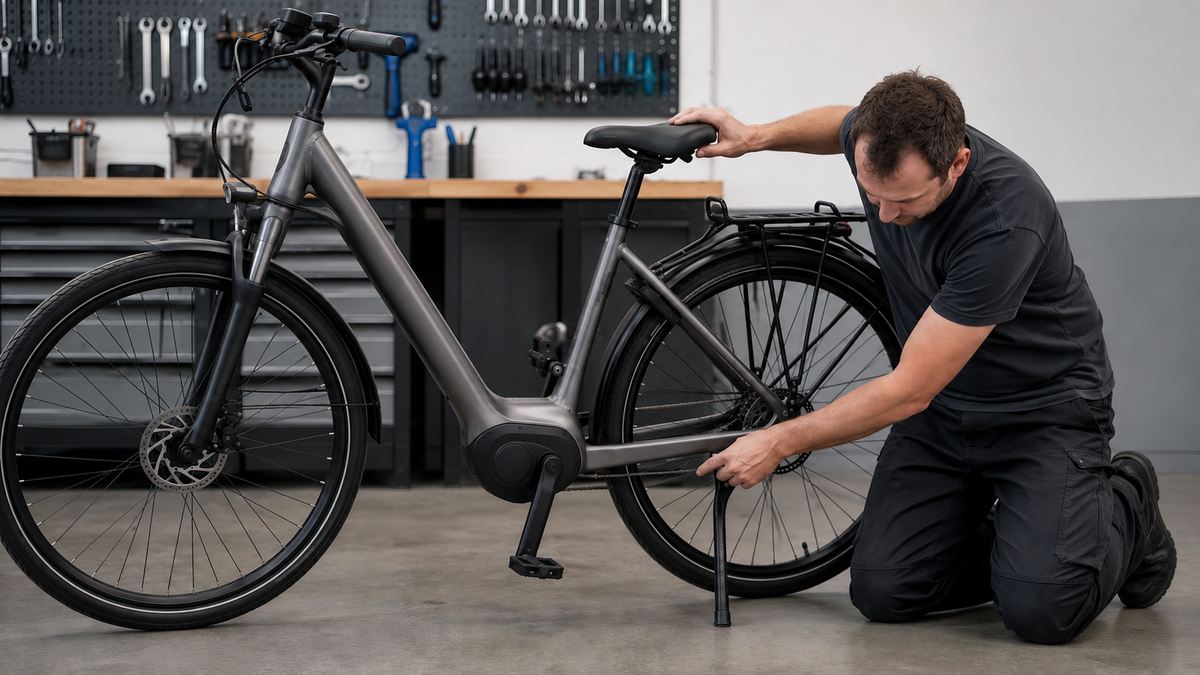
A kickstand that keeps coming loose can cause the parked bike to tip over without warning. This is particularly risky with a heavy e-bike, a child seat, or loaded panniers. Retract the stand, unload the bicycle, and position it for inspection so that it does not rely on the loose kickstand.
Before tightening a screw, you need to know which part has play. Possible causes include the connection to the frame, a joint in the kickstand, an adjustable leg length, or a worn foot. If the entire mount on the frame rotates or you can see a crack, this is not a normal adjustment issue.
Where can a bicycle kickstand be loose?
Rear-mounted kickstands are often attached to a standardized or manufacturer-specific mount near the rear wheel axle. Terms such as KSA 18 or KSA 40 describe, among other things, the distance between the mounting points; they are not interchangeable quality grades. Center-mounted kickstands are attached in the area behind the bottom bracket. Frames without a designated mount require an explicitly compatible solution.
Hold the retracted kickstand with one hand and move it sideways, across its normal folding direction. As you do so, observe the screw heads, base plate, joint, and leg in sequence. Play directly between the kickstand and frame indicates an attachment issue. Movement only at the joint may indicate wear. If only the adjustable foot moves, check its locking mechanism.
| Observation | Likely area | Next decision |
|---|---|---|
| Stand moves together with the base plate | Frame mount or attachment | Check screws, threads, and contact surfaces |
| Base plate remains secure, leg wobbles sideways | Joint or bearing | Check the manufacturer’s limit; replace if worn |
| Leg length changes | Adjustment or locking mechanism | Check the position and model-specific securing mechanism |
| Bike stands very upright or at too steep an angle | Length, mounting position, or surface | Adjust on a level surface according to the instructions |
| Crack, bent mount, or damaged thread | Load-bearing connection | Do not put weight on it; consult a specialist workshop |
Check the loose kickstand safely
1. Fully unload the bicycle
Remove luggage and detachable loads from the bike. No one may sit on the bicycle while it is resting on the stand. Work on a level, non-slip surface and secure the bike with a second person or a suitable repair stand. A kickstand is not a lifting platform.
On an e-bike, switch off the system. If cables are near the mounting point, they must not be pinched or used as a support point. Photograph the initial position. This will help you determine later whether the stand has twisted again and show the workshop its original position.
2. Clean the mounting interface and components
Remove loose dirt with a cloth or soft brush. This makes bolt heads, cracks, and signs of a shifting mounting plate visible. Do not use a high-pressure jet on the joint or adjacent bearings. Oil on the bolt or contact surface is also not a general solution; lubrication and threadlocker should be used only in accordance with specific installation instructions.
3. Identify the mounting type and bolts
Compare the stand, mounting interface, and fasteners with the documentation from the bicycle and stand manufacturers. The Hebie installation instructions for a KSA-18 rear-mount stand provide an example of a clearly defined mounting interface, alignment, and installation sequence. They assume basic bicycle maintenance knowledge and recommend installation by a specialist retailer; if you lack experience, stop the self-check here. The instructions do not automatically apply to a center stand or a different model.

If a bolt is missing, bent, or its head does not fit the tool properly, do not improvise a replacement from your spare parts box. Length, thread, strength, washers or other spacers, and any possible threadlocker are all part of the connection. The wrong fastener may hold at first and later damage the frame threads or the stand.
4. Tighten only according to the manufacturer's specifications
Fully engage the correct tool and hold the stand in the specified position. If the manufacturer specifies a torque or tightening sequence, use that exact specification. There is no universal value for all bicycle stands. If there are two bolts, the installation sequence from the relevant instructions should also be followed rather than tightening one side arbitrarily as much as possible.
If the screw keeps turning without a noticeable stop, metal filings come out, or the connection remains loose despite using the correct tool, stop. A damaged thread cannot be made safe with a longer screw or more force. Information on controlled tightening can be found in the article Using a torque wrench on a bicycle.
5. Adjusting the leg length and contact area
Many stands are adjustable in length. The bike should stand stably at a slight angle on firm, level ground, without almost balancing upright or tipping dangerously far. The foot should have as much full ground contact as possible. Adjust the length only within the designated notches or limits, and secure the adjustment as described in the instructions.
The foot must not be deeply cracked, heavily worn, or loose. On soft ground, a suitable support designed for this purpose distributes the load better; an arbitrary smooth plate, on the other hand, may slip away. Avoid parking on a slope whenever possible. If this cannot be avoided, position the bike so that it cannot start moving, and use additional securing.
Final check without attempting to tip it
Fold the stand in and out several times. It must reach its end position, must not rub against the tire, brake disc, crank, or cables, and should not unfold by itself. Then place the unloaded bike on level ground. Do not press abruptly on the luggage rack or saddle; instead, observe whether the base plate, joint, and foot remain steady.
Only once the unloaded test is stable should you gradually add a typical, permitted luggage load. Observe the bike’s permitted total weight and the limits of the luggage rack and stand. Our guide to calculating the permitted total e-bike weight explains which loads are added together. A stand does not make overloading safe.
Why does the screw keep coming loose?
Recurring play can be caused by a base plate that does not sit flat, an incorrect screw, a damaged thread, vibrations, or an overloaded mounting point. A stand that strikes something while riding also constantly transfers additional forces. So do not just tighten the loose screw; look for the cause of the load.
The Trek accessory guide makes clear that accessories should be compatible and installed according to the instructions. If the manufacturer’s documentation requires threadlocker, its type and application must be exactly right. Without approval, adhesive should not be used to conceal a damaged thread.
When the kickstand must no longer be used
Do not use it if there are cracks in the frame or mounting plate, visible deformation, a severely worn joint, a broken foot or a damaged thread. The same applies if the kickstand does not lock securely or could reach moving parts while riding. Secure the bicycle by other means and have the cause professionally inspected.
After a fall with heavy luggage, another visual inspection is advisable. A bent mount may affect the frame structure. With carbon frames or unclear adapter installation, having a specialist workshop inspect it is especially important, because not every type of damage can be reliably detected from the outside.
Frequently asked questions
Can I simply tighten the bolt on the bicycle kickstand more firmly?
Only with the appropriate tools and according to the instructions for the specific kickstand or frame. Applying more force can damage the thread and mount and will not correct an improper fit.
Why does my bicycle tip over despite having a tight kickstand?
Possible reasons include an incorrect leg length, a worn foot, soft or sloping ground, or unevenly distributed luggage. Check the parking angle and load, not just the mounting bolt.
May someone sit on the bike while the kickstand is deployed?
No, unless the specific product expressly provides otherwise. Standard bicycle kickstands are intended for parking, not for supporting a seated person.
Does threadlocker help prevent recurring loosening?
Only if the kickstand and frame manufacturers approve it and the thread is intact. It does not replace the correct fastening hardware or an investigation of the cause.
Conclusion
A loose bicycle kickstand requires more than blindly tightening it. Take the weight off the bike, locate the play, inspect the mount, joint, adjustment and foot, and work exclusively according to the specific installation instructions. Recurring play, damaged threads or cracks are clear reasons not to put further strain on the kickstand.
As of September 6, 2026. This article does not replace the installation instructions or an inspection of the frame mount by a specialist workshop.
Share:
Bicycle lock jammed: lubricate the cylinder and avoid using force
Bike light flickering: Safely check the power source and contacts