

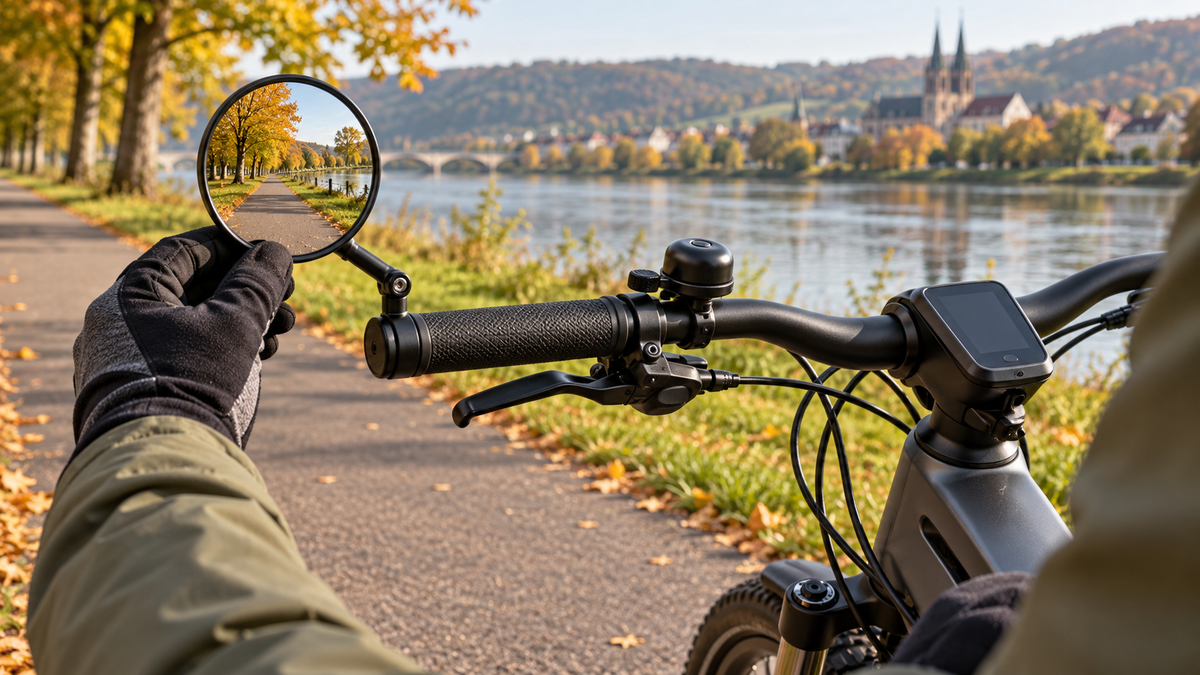
If you want to choose and adjust a bike mirror, don't focus only on the size of the mirror surface. What matters is the right mounting method, enough space on the handlebar, unobstructed operation of the brake and bell, and a steady field of view in your riding position. A well-adjusted mirror makes it easier to take a quick look behind you. However, it does not show every area and does not replace a shoulder check before turning or changing lanes. This guide takes you from choosing a mirror to a supervised test ride.
Which bike mirror fits your handlebar?
Start with the cockpit, not the shape or price. Take photos of the handlebar from the front and above. Measure only where the instructions for the specific mirror require it. Check the material, inner or outer diameter, handlebar ends, brake levers, shifters, bell, display, cables, and existing mounts. For a carbon handlebar or an unusual handlebar profile, you need explicit approval from the manufacturers involved.
The user manual for a ROSE handlebar mirror specifies compatibility for the particular model: it lists specific handlebar measurements, mounting positions, and exclusions for this product. These values must not be applied to another mirror. Always use the instructions for the exact model you purchased.
| Mounting | May be a good fit if ... | Check before buying |
|---|---|---|
| At the handlebar end | there is little free clamping space at the grip and the handlebar end allows approved internal clamping | Inner diameter, grip opening, material approval, adapter, and additional overall width |
| At the outer end of the handlebar | a suitable clamping surface is available and the controls can be positioned as instructed | Space for your hand, grip, brake and shift levers, and risk of collisions when parking |
| Clamp beside the grip | the mirror should sit closer to the handlebar axis and a suitable free spot is available | Handlebar diameter, clamp width, cable routing, and unobstructed operation of all controls |
No design is automatically the best. A mirror mounted farther out may be easier to see past your arm, but it makes the bike wider. An inward-mounted clamp may be better protected, but it needs free space in an already crowded cockpit. A foldable mirror is practical when parking or transporting the bike, provided you return it to the position specified in the instructions before riding.
Compare the mirror surface, arm, and joint thoughtfully
Field of view over the smallest possible design
The mirror should show a useful view of the road behind you without requiring you to turn your upper body. Very small mirrors save space but can make it harder to see. Depending on the design, a convex or aspheric mirror may show more of the surrounding area. However, vehicles may appear smaller and distances may seem unfamiliar. Practice judging them on a calm test ride.
Arm length and range of adjustment
A longer arm can position the mirror beyond your shoulder, jacket, or luggage. At the same time, it creates more leverage and makes the bike wider. A shorter arm is more compact, but shouldn’t mainly show your own body. Before buying, check whether you can adjust the joints and arm far enough in your normal riding position. Product photos on a different bike aren’t enough to tell.
A steady image and replacement parts
A wide field of view is of little use if the mount keeps slipping or vibrates excessively on normal surfaces. Look for a design approved for the intended use, clear installation instructions, and available replacement parts. A mirror designed for city and touring bikes isn’t automatically suitable for off-road riding, an S-pedelec, or every type of handlebar.
Before installation: check five things
- Approval: Do the bicycle type, handlebar shape and material, and intended mounting side match the mirror instructions?
- Dimensions: Do the clamp or internal mount match the specified diameters and surfaces?
- Operation: Can you fully reach and read the brake levers, shifters, bell, and display in your riding position?
- Cables: Are all brake lines, cables, and control cables free from kinks, pinching, and tension?
- Tools and specifications: Do you have the right tools and the model-specific tightening specifications?
Don’t move or twist safety-critical controls by guesswork. The ROSE instructions expressly warn that the mirror position could interfere with the brake or bell. They also point out that the mirror makes the handlebars wider. If you’re unsure about the required clamping force, cable routing, or specified torque, have a bicycle shop install it.
How to adjust a bicycle mirror step by step
Perform the initial adjustment while stationary in a quiet place. The bicycle must be stable; another person can hold it steady. Sit in your usual riding position, place both hands on the handlebars and brake levers, and look straight ahead. Only then should you adjust the mirror. Adjusting it while standing beside the bike often won’t match your actual eye level.
- Adjust the arm so that your hand, jacket sleeve, or luggage does not obscure most of the mirror.
- Aim the mirror at the traffic area behind you. A narrow edge of your shoulder or arm can serve as a reference; most of the mirror should show the relevant area behind you.
- Secure the mirror exactly as described in the product instructions. Do not use torque values taken from another set of instructions.
- Move the handlebars and operate all controls while stationary. Nothing should jam, collide, or restrict brake operation.
- Take a short test ride on a flat road with little traffic. Check the image in your normal riding position, while making small steering movements, and on slightly uneven pavement.
Stop before making any adjustments. Turning the mirror while riding takes one hand off the handlebars and draws your gaze away from traffic for longer. If it takes several adjustments to get a steady image, check the mount again afterward according to the manufacturer’s instructions.
Combining mirror checks and shoulder checks correctly
A bicycle mirror is an additional source of information. It can help you monitor traffic behind you early without having to turn your head far for every quick check. However, it does not automatically show all the areas to your sides. The image is also affected by the mirror’s size and curvature, vibration, clothing, and cargo.
The ROSE guide therefore warns against relying on the mirror alone and says you must still look over your shoulder when turning. An ADFC article on bicycle mirrors also emphasizes that some situations require an additional shoulder check. A practical sequence is:
- Keep a steady eye on the traffic ahead and any potential obstacles.
- Briefly use the mirror to get an initial picture of the situation behind you.
- Signal your intention to turn clearly and in good time.
- Make a controlled shoulder check immediately before moving sideways.
- Only turn or change lanes when the way is actually clear.
If you lose your line when looking over your shoulder, practice the movement away from traffic first. The guide to looking over your shoulder on a bicycle describes a step-by-step approach. A mirror can supplement your practice, but it cannot make up for a lack of control.
Checks after installation, parking, and a crash
Before your first ride, check that the mirror is firmly mounted, the image is clear and undamaged, and the handlebar controls move freely. After that, follow the maintenance intervals and inspection points in the specific instructions. General calendar- or distance-based guidelines don’t automatically apply to every model.
After an impact, tip-over, or crash, simply turning the mirror back into position isn’t enough. Check the housing, joints, clamp, handlebar, and adjacent controls for visible damage or loose parts. If the handlebar is affected, the view is distorted, or the mounting no longer feels secure, don’t ride the bike until the components have been professionally inspected.
Frequently asked questions about bike mirrors
Do I need a mirror on the left or right?
Don’t choose a side by default. Check which side the specific model is designed to mount on and which area of traffic behind you needs monitoring. In Germany, many everyday models are offered for the left side, but the product approval and your own cockpit are still decisive.
Is a bigger mirror always better?
No. A larger surface can make things easier to see, but often increases width, weight, or the risk of collision. What matters more is a sufficiently large, steady field of view that isn’t blocked by your arm and stays stable with the intended mounting method.
Can I adjust the mirror while riding?
To adjust it, stop in a safe place. Keeping one hand on the mirror and looking at the reflection for too long reduces your control. After adjusting it, check the mounting and operation again.
Does a bike mirror replace looking over your shoulder?
No. Mirrors have blind spots depending on their position, and distances can appear different. Use the mirror to get an early sense of traffic, but continue to look directly over your shoulder before turning or changing lanes.
Conclusion: Check compatibility first, then field of view
Choosing the right bike mirror starts with the handlebar, controls, and manufacturer approval. Compare bar-end and clamp mounting based on space, width, and ease of use. Adjust the mirror in your normal riding position, test it in light traffic, and make adjustments only while stationary. If the image stays steady and the handlebar remains fully operable, the mirror helps you monitor what’s behind you. Direct checks before moving sideways are still essential.

Share:
Time change on October 25, 2026: Prepare for commuting by e-bike in the dark
E-bike on wet leaves and farmyard ice: how to start, steer, and brake safely