

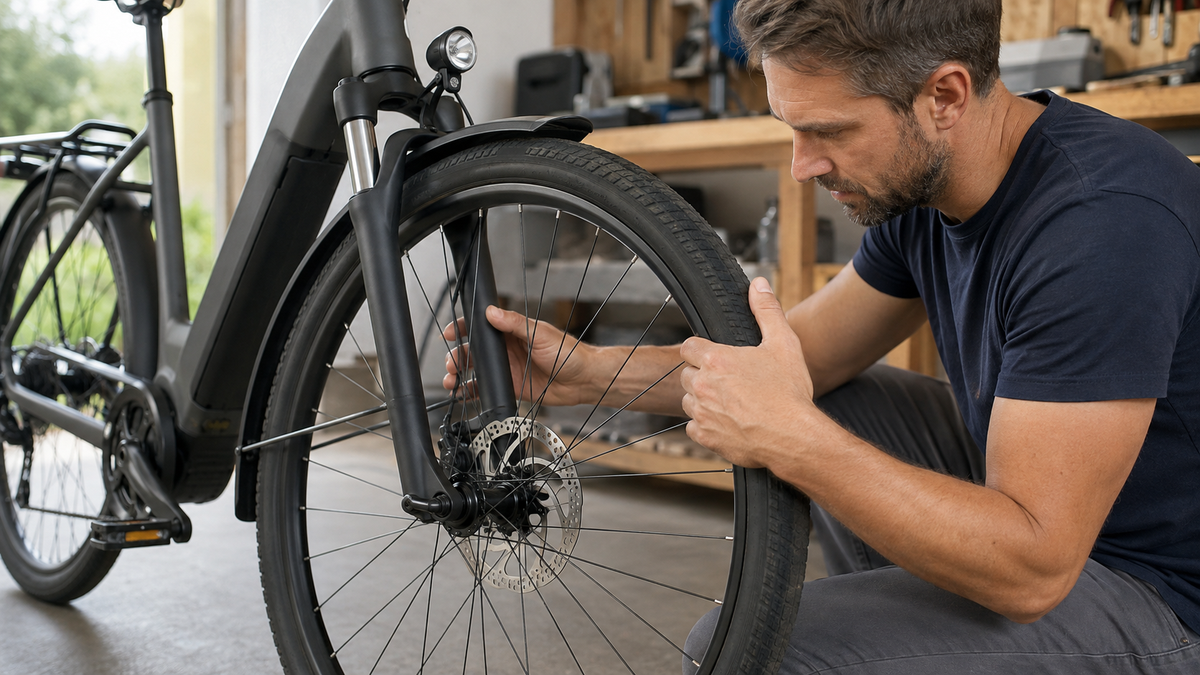
After transporting the bike, a flat tire, or workshop work, it is worth taking a quick look at the wheel fastening. A thru-axle on a bicycle passes through the hub and frame or fork and is screwed into a matching thread. However, the lever, hex interface, thread, length, and tightening specification vary. A blanket figure or “two more turns” would therefore be risky. Use this check to inspect the seating and surrounding area without mixing different axle systems.
Unclear wheel fastening is a stop signal
Do not set off if the wheel is visibly misaligned, the axle is missing, does not engage fully, or cannot be secured as described in the instructions. The same applies in the event of damaged threads, a bent axle, a cracked dropout, noticeable lateral play, or a lever that touches the brake disc or frame. An incorrectly installed thru-axle can release the wheel and cause a serious fall.
The brake disc and caliper may be hot after a ride. Let them cool down and do not touch the sharp-edged disc. If the wheel is rotating, keep your hands and tools away. If you cannot confidently identify the design or installation instructions, do not experiment: have a dealer or specialist workshop check compatibility and fastening.
Thru-axle, quick release, or bolt-on axle?
A thru-axle is a removable axle bolt that passes through the hub into the thread of the fork or frame. Some models have an integrated folding lever, while others are tightened with a hex key or a special tool. By contrast, a quick-release skewer uses a thinner clamping rod with an eccentric lever; a bolt-on axle is secured with axle nuts. The operating principles are not interchangeable.
Look for the axle, frame, or fork model designation and the corresponding current instructions. For Shimano E-THRU I 12 mm, for example, the user instructions describe a specific lever movement and position. This is only an example of a system. An axle from another manufacturer may require a different torque, lever position, or lubrication procedure.
The inspection points at a glance
| Inspection point | No abnormalities | Stop or seek clarification |
|---|---|---|
| Wheel seating | Hub is fully seated in the designated mounts | Misaligned, gap, or incorrect position |
| Axle | Correct model, complete and undamaged | Bent, corroded, cracked, or incorrect length |
| Thread | Clean, engages easily as described in the instructions | Cross-threading, chips, or unusual resistance |
| Lever/tool interface | Specified final position or correct torque | Lever remains open or value cannot be determined |
| Clearance | No contact with the rotor, frame, or fork | Contact or the lever may catch |
| Functional check | Wheel secure, brake operates in a controlled manner | Play, a change in rubbing, or an uncertain pressure point |
Before every ride after removal or transport
- Park the bicycle securely, switch off the drive system, and let the brake cool down.
- Identify the axle system and open the corresponding manufacturer’s instructions.
- Check whether the wheel is fully and straight seated in the fork or frame.
- Check the axle head, visible axle body, area around the threads, and lever for damage and dirt.
- Secure the axle exactly as instructed: using the specified lever position or the prescribed tool and torque.
- Check clearance for the lever, brake rotor, frame, and accessories.
- Test that the wheel is secure, that it spins freely, and that both brakes work while stationary; then test at very low speed on a safe surface.
Why no universal torque setting is suitable
Axle diameter, thread pitch, material, lever mechanism, and frame design vary. Even the values shown in a Shimano manual apply only to the E-THRU system named there. If you transfer a value from another system, clamping may be insufficient, or the threads and frame may be overloaded. Read the value on the axle or in the current manual, and clarify any discrepancies with the manufacturer.
A torque wrench is only helpful if the tool, unit, measurement range, and target value are correct. Keep your hand at the grip point and do not use a pipe extension. Operate a folding lever only as specified in its instructions. Shimano expressly warns against using a hammer or other objects to close the specified E-THRU system.
Cleanliness, threads, and lubrication
Dirt in the dropout, axle hole, or threads can prevent the wheel from seating completely. Shimano requires foreign matter and dust to be removed before installation for the specific E-THRU system. Wipe away loose dirt with a clean cloth. Have metal shavings, damaged threads, or a suddenly hard screwing motion assessed by a qualified professional.

Grease is not a universal solution. Some manufacturers require specified lubrication, while others require a clean, dry contact surface or a particular product. Use only the specification for the axle and frame. Avoid getting oil on the brake rotor or pads. Do not “free up” a stiff axle by force.
Check lever position and clearance
With a lever-operated axle, the lever must reach its intended end position. In the Shimano example, it is tilted fully into the CLOSE position and aligned so that it does not contact the frame or brake rotor. Other systems may use a removable or freely positionable lever. What matters is the relevant instructions, not the appearance of another bicycle.
Also check the luggage rack, fender stays, and trailer adapter. Accessories must not shift the contact surfaces or block the lever. A child or cargo trailer requires an adapter approved by the bicycle, axle, and trailer manufacturers, with the appropriate length and thread pitch. A longer axle chosen “by eye” is not a safe solution.
Quick check: useful, but not proof of the tightening torque
For its E-THRU system, Shimano describes an additional quick check: Check the unloaded wheel and test it for lateral play. The same instructions emphasize that this test does not guarantee the correct tightening torque. This is the important limitation: A wheel may initially feel secure even though the attachment was not carried out according to the specifications.
With the bicycle stationary, grip near the rim or tire and carefully check whether the entire wheel moves relative to the fork or frame. Detectable play may come from the axle attachment or the hub. The article Bicycle hub with play explains this distinction. If the cause is unclear, do not ride the bicycle.
After parking in public and transporting the bicycle
A check is particularly advisable if the bicycle has been left unattended. Shimano explicitly cites public bike parking areas as a reason to check the E-THRU levers before riding. Transport on a rack, packaging, or wheel removal can likewise alter the attachment. Check both wheels, even if only one was removed.
When transporting the bike without the front wheel, a suitable spacer protects the hydraulic brake pads if specified by the brake manufacturer. Do not pull the brake lever without the wheel or spacer installed. After installation, check the brake while the bike is stationary. New rubbing may indicate that the wheel is seated differently, but it is not a reason to adjust the brake caliper prematurely.
When the workshop should take over
Professional assistance is needed if the axle does not engage easily with the intended thread, the specified torque is unavailable, the lever and frame collide, or the wheel still has play despite correct installation. This also applies after a crash, with a bent derailleur hanger, a damaged fork, or a noticeably abnormal brake disc. Provide the manufacturer, model, axle dimensions, and the reason for removal.
Photograph both dropouts, the axle, and the installation area, but do not publish any serial numbers. Note whether the bicycle was transported, serviced, or fitted with accessories. A clear description is more likely to save time than repeated tightening without diagnosing the issue.
Frequently asked questions about bicycle thru-axles
How tight does a bicycle thru-axle need to be?
As tight as specified in the instructions for the axle and bicycle for this exact system. There is no reliable universal value. Lever axles and tool-operated axles may require different procedures.
Do I need to grease the thru-axle?
Only as specified by the manufacturer and with the approved product. A different lubrication recommendation may affect clamping or the material. The brake friction surfaces must remain free of oil and grease in all cases.
Is it enough to shake the wheel sideways?
No. The check may reveal play, but it proves neither correct installation nor the correct torque. Fully check the wheel seating, axle, final position, and manufacturer’s specification.
Can I use any 12 mm thru-axle?
No. The length, thread pitch, thread length, head, and system compatibility must match. Shimano expressly warns against using an axle with a different model designation in its own E-THRU system.
Conclusion: the system first, then a secure fit
A thru-axle on a bicycle is secure when the wheel, axle, frame, and instructions are compatible. After removal, transport, and parking in public, check that the wheel is seated straight, the contact surfaces are clean, the threads are undamaged, the final position is correct, and the lever has a clear path. A shake test supplements this check but does not replace a specified torque value. If there is resistance, play, or uncertainty about compatibility, leave it to a workshop.
As of: September 6, 2026. Assembly, lubrication, lever position, and torque must be based exclusively on the current instructions from the manufacturer of the specific axle, frame, fork, and hub.
Share:
Bicycle helmet after a crash: inspect, retire, replace
Bicycle Brake Pads Worn Out: How to Safely Recognize Wear