

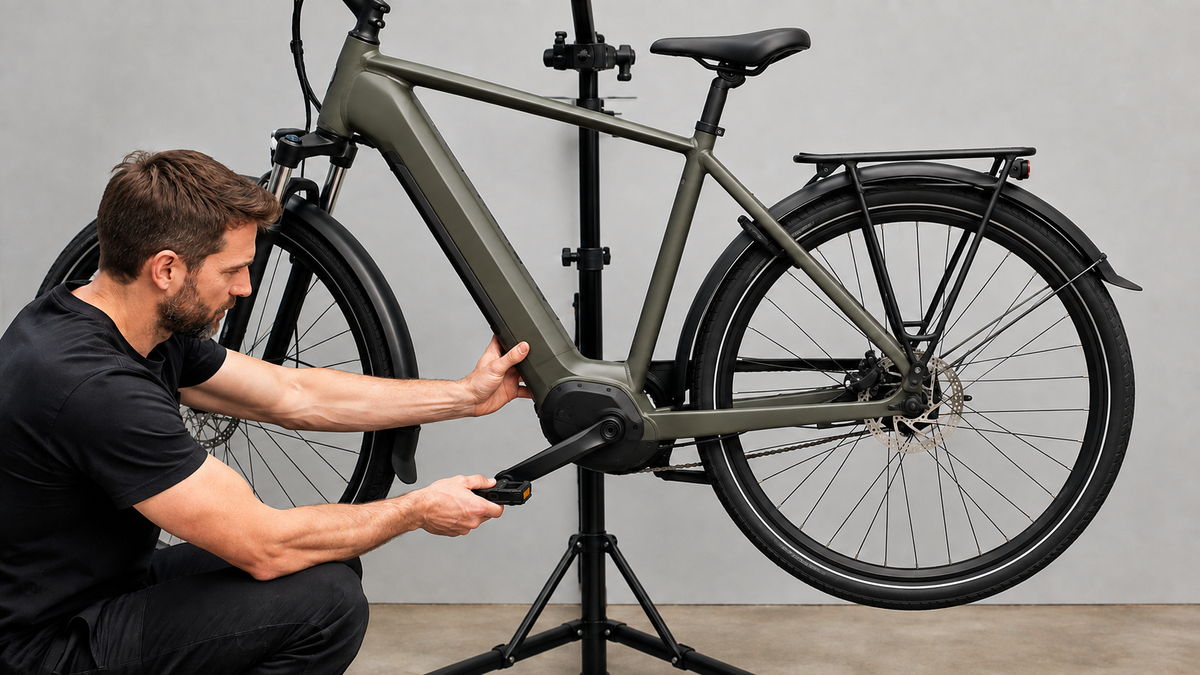
The crank can be moved sideways, it clicks when pedaling, or its movement feels rough: this is often generally described as a “broken bottom bracket.” For a useful diagnosis, however, three things must be distinguished: perceptible play, a noise, and a drivetrain problem. Careful checks on a stationary bike can narrow down the source without tightening an unfamiliar bearing system on suspicion.
Significant play matters more than a single click
A noise alone does not prove bottom bracket damage. The pedal threads, crank fastening, chainring bolts, saddle, kickstand, or loose cables can sound similar; the frame transmits the sound. By contrast, noticeable lateral movement of the entire crank axle is a specific finding. If it repeatedly returns or a fastening is visibly loose, leave the bike stationary until the issue has been clarified.
A suddenly stiff or catching motion, or contact with something rubbing, also requires an inspection. On an e-bike, switch off the system. Do not activate the assistance or walk-assist function while your hands are near the crank, chain, or chainring. A heavy bike is best placed on level ground or in a repair stand approved for its weight and frame.
Distinguish play, roughness, and a chain problem
| Observation | Possible area | Next safe step |
|---|---|---|
| Only the pedal body wobbles | Pedal or pedal bearing | Check the pedal separately; do not jump to conclusions about the crank axle |
| One crank arm moves relative to the axle | Crank fastening or crank interface | Do not continue riding; the system and manufacturer’s instructions determine the next steps |
| Both crank arms move together across the frame | Bottom bracket, axle, or system-dependent preload | Document the movement and have it professionally inspected |
| Crank turns roughly, catches, or rubs | Bearings, seal, chain guide, or drivetrain | Locate the source without load; do not apply further force if there is resistance |
| Chain skips only under high load | Chain, cassette, chainring, or gears | Check the drivetrain separately; repeat the bottom bracket play test |
This classification narrows down the possibilities; it is not a remote diagnosis. Our separate guide to the bicycle chain skipping under load covers wear and shifting. It does not replace an inspection if the crank itself moves sideways.
First stationary test: transverse movement at both cranks
- Switch off the e-bike, select a medium gear, and park the bike securely. Remove any loose luggage.
- Position both crank arms approximately horizontally. Grip them near the pedals, not at the chain or chainring.
- Move the cranks with light force, alternating between the left and right sides of the bike. Jerky lever movements are not necessary.
- Observe whether only one pedal, only one crank arm, or the entire axle moves relative to the bottom bracket shell.
- Repeat the check with the crank in two additional positions. Stop if you see looseness, rubbing, or unusually large movement.
A second person can place a finger on the outside of the transition between the frame and crank without reaching into the drivetrain. This can reveal whether the axle moves relative to the shell. A video taken from close by at the side is more helpful to the workshop than the description “it is loose.”
Second stationary test: observe operation without riding load
Slowly turn the crank backward by hand, provided the bicycle’s instructions allow this. Watch for recurring hard spots, rubbing, and uneven resistance. The chain itself creates noise and tension during this test, so it is not a pure bearing-running test. Removing the chain or crank should only be done by experienced hands and is not necessary for the initial assessment.
Then check whether a pedal tilts sideways, a chainring visibly wobbles, or a chain guard or cable rubs against the crank. Never reach between the chain and chainring. If the fault cannot be clearly isolated, leave the assembly unchanged and take it to a workshop with the documentation.
Why there is no universal adjustment screw
“Bottom bracket” covers various designs: cartridge bearings with an internal axle, external bearing cups, press-fit systems, and manufacturer-specific motor or crank mounts. The Park Tool guide to bottom bracket identification shows that the design, tool, and service procedure depend on the specific system.

A preload bolt, spindle nut, or adjustment ring is therefore not automatically intended to “turn away the play.” Park Tool describes adjustment using a preload ring only for systems that actually have such a ring. With other designs, the same action may have no effect or may put stress on the bearings and threads.
Before any disassembly, find the exact crank and bottom bracket designation in the bicycle or component documentation. A photo of the right and left crank sides, the visible bearing cups, and all markings is usually enough for a specialist to identify the system. Do not adopt torque values or spacers from a similar online video.
Systematically rule out obvious sources of error
Pedals: Hold the crank arm firmly and move only the pedal body. Play within the pedal is not the same as a loose connection between the pedal axle and crank. The left and right pedals also have different thread directions; our article on changing bicycle pedals explains this distinction.
Crank arm: Visible movement of an individual arm relative to the axle is a stop-riding condition. Continuing to ride can damage the interface. Do not tighten the bolt “by feel.” The sequence, counterhold, preload, and specified value depend on the crank system.
Chainring and accessories: Only check while stationary whether fasteners are visibly missing, a chain guard is touching, or a cable is hitting the frame. Loose chainring bolts can cause noises, but they are not permission to tighten all visible bolts indiscriminately.
Saddle and stand: Creaking often occurs only under the rider's weight and is transmitted through the frame. While stationary, press separately on the saddle and luggage rack without sitting on the bike. If a noise disappears, that is helpful; previously measured crank play must still be inspected.
Typical quick fixes that can cause more harm
- Do not spray penetrating oil from the outside into bearings, the motor area, or seals.
- Do not “secure” a bearing cup with unsuitable tools or blows.
- Do not tighten a preload ring so far that the crank becomes stiff.
- Do not tighten a crank fastener with a long lever without the manufacturer's specified value.
- Do not provoke a noise with a load-bearing test ride.
The Canyon inspection checklist categorizes the crank, chainrings, and bottom bracket as a connected inspection area. This makes sense: A single audible point does not yet indicate which component is causing the problem.
When the bike should remain stationary
Do not continue riding if a crank arm is visibly loose, the entire axle clearly shifts, the bearing is seized, metal shavings appear, a crack is visible in the bottom bracket shell, or the crank touches the frame. The same applies after a hard impact or crash involving new deformation. A “cautious” ride to the workshop still creates changing loads; pushing the bike or transporting it is safer.
On an e-bike, the area may also include the motor mount, cables, or covers. Do not open a motor housing or loosen any load-bearing motor fasteners without model-specific approval. Information from a conventional bicycle cannot automatically be applied.
This information will help the workshop
- Bicycle model, model year, and exact crank and drivetrain designation
- Location and direction of the play: pedal, individual crank arm, or entire axle
- Video from two angles and the time when it first appeared
- Whether the noise or movement occurs only under load, in certain gears, or continuously
- Last service, crash, contact with water, or recent component replacement
After the repair, the invoice should state the finding and the work carried out. First check the crank again while the bicycle is stationary. A short functional test ride should only take place if there are no structural abnormalities and the manufacturer or specialist workshop has cleared the bicycle for use.
Frequently asked questions
How much lateral play is normal in a bottom bracket?
There is no universal figure. Any felt or visible movement must be compared with the specifications for the specific system and assessed by a qualified professional. A specified value from another bearing cannot be applied.
Is every creak while pedaling a sign of a defective bottom bracket?
No. Pedals, crank, chain, chainring, saddle, and attachments can transmit noises. Check for play and possible sources separately.
Can I simply tighten a loose bottom bracket?
Not without identifying the system and consulting its instructions. Some systems are preloaded, while others are installed as a unit; the tools, sequence, and torque specifications differ.
Can I still ride to the workshop with slight play?
A safe remaining distance cannot be determined remotely. If movement at the crank or axle is confirmed, walking the bicycle or arranging transport is the more reliable choice.
Conclusion
Bottom bracket play cannot be diagnosed based on a single creak. With the bicycle safely secured, first check which part is moving relative to which other part, observe its operation without riding load, and document your findings. Only after the system has been clearly identified do the applicable instructions and their specified values apply. Visibly loose cranks, axle movement, jamming, or structural damage mean you must stop riding and have the bicycle inspected by a specialist.
As of September 6, 2026. The operating and service documents for the specific bicycle, motor, crank and bottom bracket system, as well as the assessment by a qualified specialist workshop, are authoritative.
Share:
Seat post slipping: check the causes instead of tightening the clamp more firmly
Crack in the bicycle frame? How to safely inspect and document a suspected crack