

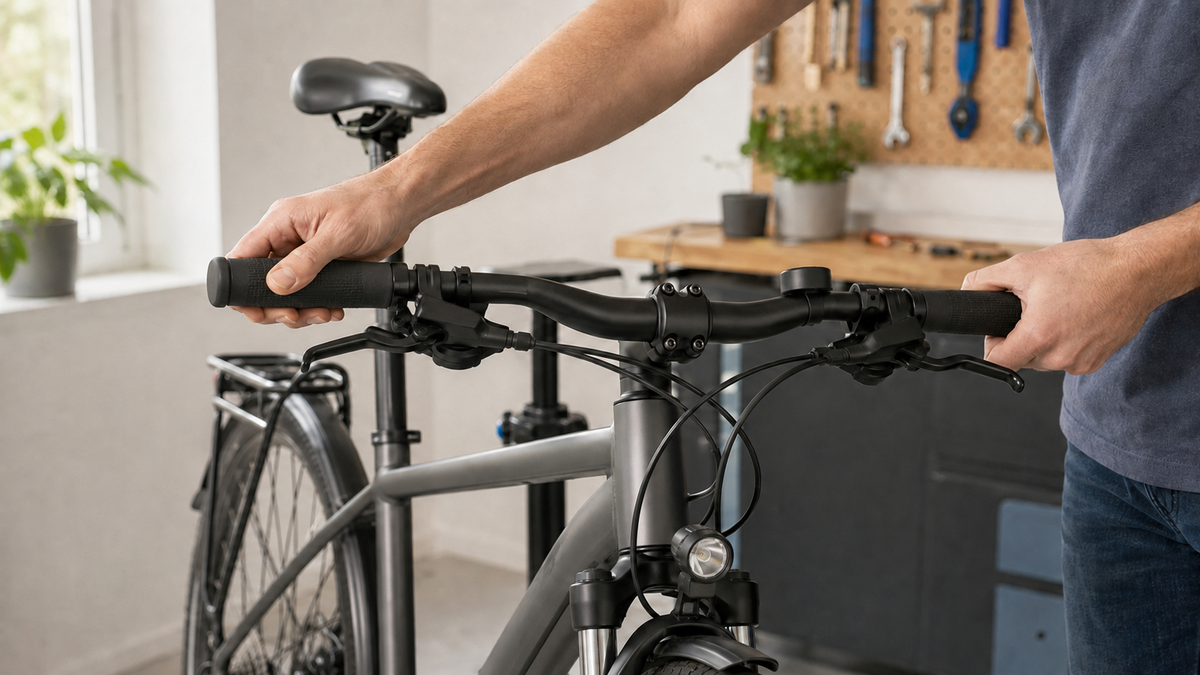
Loose bicycle grips are a safety issue: If the handhold rotates while steering, braking or riding over an edge, you no longer have reliable contact with the bike. Set the bike down and first determine whether only the grip is slipping. If the brake lever, shifter unit or entire handlebar also moves, the cause lies at another clamping point.
To find the right solution, you need to identify the type of grip. A slip-on grip is held directly on the handlebar by fit and friction. A clamp-on grip—often called a lock-on grip—has one or more clamp rings with screws. Both may feel similar, but they are secured in completely different ways. Therefore, using adhesive or tightening forcefully without checking is not a good first step.
How can you tell that a grip is loose?
Check the bike while it is stationary. Hold the grip as you would while riding and try to twist it with moderate hand force and push it outward. A correctly mounted grip will not change position. Check both sides, as moisture, wear or a loosened clamp screw may affect only one grip.
Also pay attention to the ends. Open or damaged handlebar ends can cause serious injuries in a crash. The plug must be present and firmly seated. A grip that is torn at the end, severely expanded or damaged on the inside may not remain permanently safe after cleaning. In that case, a suitable replacement is the more sensible solution.
Slip-on grip or clamp-on grip?
| Feature | Slip-on grip | Clamp-on grip |
|---|---|---|
| Visible screw on the grip | Usually not | Yes, at the clamp ring |
| Retention principle | Fit and friction | Defined clamping |
| Typical source of error | Moisture, grease, stretched inner surface or incorrect diameter | Loose screw, damaged thread or unsuitable mounting position |
| Safe correction | Remove, clean the mating surfaces and dry them completely | Check the position and tighten according to the manufacturer's specifications |
Some ergonomic grips have a wide palm rest. Its angle is an adjustment, not an additional lever for tightening. The Ergon GS1 installation instructions show by example that alignment, fully sliding the grip on, and the model-specific tightening torque all belong together. Do not apply the value stated there to another grip.
Secure loose bicycle grips safely
1. Check the work area and handlebar end
Secure the bicycle against rolling and switch off an e-bike. Remove bags or accessories that obstruct access. Check the handlebar for cracks, sharp edges, and obvious deformation. With a carbon handlebar or a visibly damaged component, do not continue working; instead, have the handlebar and grip manufacturers' approvals checked.

2. Rule out other controls
Hold the handlebar firmly and move the brake lever separately. If the entire control assembly moves, its own clamp must be checked. If the handlebar rotates in the stem, this is a different, immediately safety-relevant fault. Do not use the bicycle in either case until the affected connection has been checked according to the manufacturer's instructions.
3. Position the locking grip correctly
For a locking grip, locate the clamp screw without prying up the rubber or plastic. Loosen it only as far as specified in the installation instructions. Slide the grip fully into its intended position; it must neither extend beyond the end of the handlebar nor interfere with braking or shifting. Initially align a palm rest neutrally and check that cables and lines remain clear.
Tighten the screw only with the appropriate tool and to the specific manufacturer's specified value. A small screw head can easily be damaged. Applying more force will not fix a damaged thread and may damage the clamping ring or handlebar. Our guide to the bicycle torque wrench explains how to use a suitable wrench in a controlled manner.
4. Reinstall the slide-on grip correctly
A slip-on grip needs a clean, compatible contact surface. If you can remove it without damaging it, follow the grip manufacturer's instructions. Clean the handlebar and the inside of the grip only with an approved product and allow everything to dry completely. Grease, chain oil, and assembly paste on the inner surface reduce friction and make the grip looser.
The Ergon guide to changing and installing bicycle grips also distinguishes between the different designs. Household glue, hairspray, or aggressive solvents are not universal recommendations: they can damage the grip material or coating and make later removal more difficult. Use only products that both component manufacturers expressly approve.
If a slip-on grip can still be easily twisted on the cleaned, dry handlebar, the diameter or condition is probably no longer suitable. Do not measure only the outside of the grip. The approved combination of handlebar and grip is what matters. Replace a stretched or cracked product with a compatible pair.
5. Final check before the test ride
Install secure handlebar end plugs. Then twist and pull both grips using controlled hand force. Operate the brakes and gears while stationary and check that your hands reach their natural position without the hand rest or grip end obstructing a lever. Begin the test ride only in an area free of traffic and at low speed.
The Trek Bicycle Guide includes checking the handlebar, stem, grips, and controls as part of the safety check. This is the right standard: the grip is only fully installed once it stays firmly in place and all steering and braking functions continue to work unchanged.
When new grips or a workshop are needed
Replace the grips if the material is cracked, has become sticky and broken down, is noticeably stretched, or the clamp is broken. A stripped screw head, damaged thread, or clamp ring that does not hold despite being correctly positioned must be professionally assessed. Do not ride with makeshift wire, cable ties, or a screw of unknown strength.
A workshop inspection is also advisable if the handlebar has visible notches, carbon is involved, or multiple cockpit components are moving. After a crash, the apparently loose grip may be only the most noticeable symptom. The handlebar, stem, levers, and fork must then be inspected together.
How to keep your grips securely in place
Check the fit after the first ride with newly installed grips and during your regular pre-ride inspection. Do not carry the bicycle by the outer end of the grip if this creates lateral load. When cleaning, use little liquid around the cockpit, avoid oily care products on grips or brake levers, and dry everything thoroughly afterward. After transport, a crash, or tipping over, perform an additional manual check. This helps you detect renewed movement early.
Frequently asked questions
Can I simply glue a loose bicycle grip in place?
Not necessarily. Adhesive can damage the material, conceal an improper fit, and make later removal more difficult. First identify the design and follow the approval of the grip and handlebar manufacturer.
Why is only one grip rotating?
A single side may be affected by moisture, cleaning products, wear, or a loosened clamp screw. Nevertheless, check both grips and the adjacent controls.
Can I ride with a slightly rotating grip?
No. Even a small movement can become unexpectedly greater during an evasive maneuver or braking. A cautious test ride is advisable only after firm installation and a complete function test.
Do I need a torque wrench for lock-on grips?
If the manufacturer specifies a tightening torque, using a suitable torque-controlled tool is the safest choice. Use only the value and sequence specified for the particular model—not a general figure from the internet.
Conclusion
With loose bicycle grips, the design determines the solution: slip-on grips require clean, dry, properly fitting surfaces, while lock-on grips require an undamaged clamp tightened according to the manufacturer’s specifications. Always check the handlebar end, levers, and stem as well. If a grip remains movable or a component shows damage, the bicycle must not be used until the issue has been professionally resolved.
As of September 6, 2026. This article does not replace the installation instructions provided by the grip, handlebar, or bicycle manufacturer.
Share:
Bicycle lock jammed: lubricate the cylinder and avoid using force
Bike light flickering: Safely check the power source and contacts