

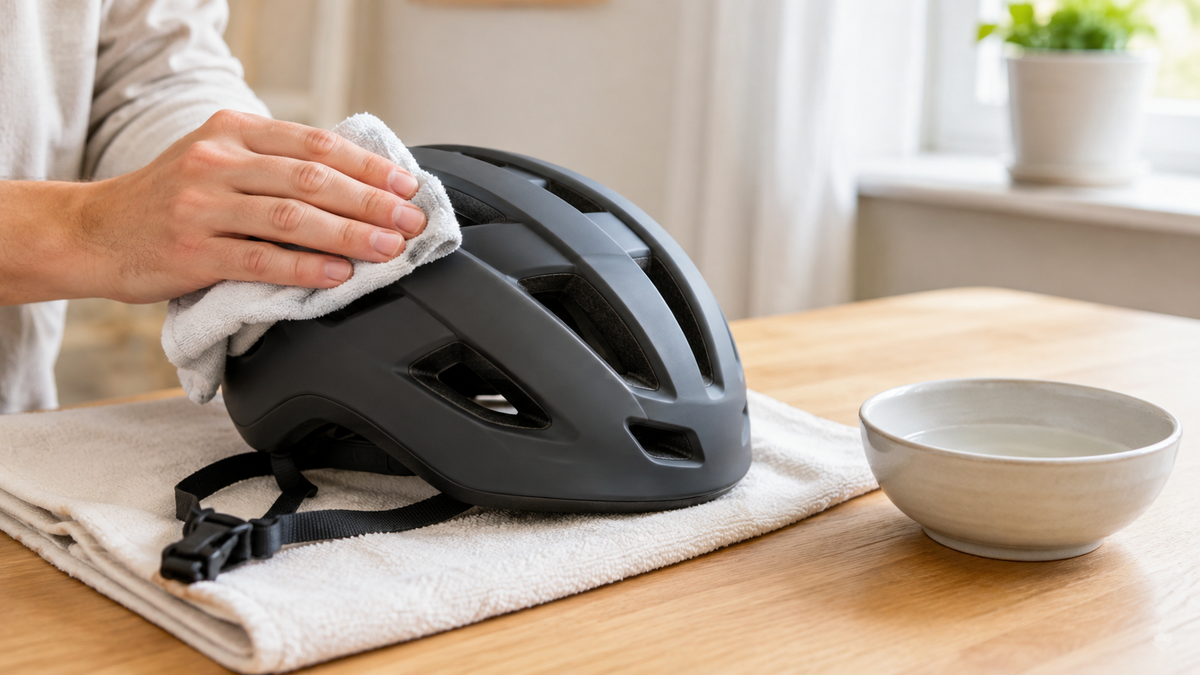
A bicycle helmet collects sweat, dust, sunscreen, and insect residue. However, cleaning does not require aggressive products: lukewarm water, a mild soapy solution, and a soft cloth are sufficient for many models. The specific helmet’s user manual is decisive, as padding, visor, light, adjustment system, and adhesive bonds vary. Cleaning is also a good opportunity to check the shell, straps, and buckle for damage.
Preparation: Check the model instructions first
Place the helmet on a clean towel and remove only accessories that the instructions specify may be removed. Photograph the position of removable padding before taking it out so that it can be reinstalled without being twisted. For integrated lighting or electronics, follow the relevant care instructions; a splashproof component must not automatically be soaked.
Have two soft cloths or sponges, a small bowl of lukewarm water, and a small amount of mild cleaning agent ready. Do not use scouring pads, hard brushes, solvents, gasoline, disinfectants, strongly alkaline cleaners, or high-pressure water jets. uvex expressly warns against solvents; ABUS recommends mild soapy water and soft materials.
Which area requires which treatment?
| Helmet area | Gentle method | Important limitation |
|---|---|---|
| Outer shell | Wipe with a damp, soft cloth and mild soapy water | Do not scrub or treat with solvents |
| Ventilation openings | Carefully loosen wet dirt with a soft cloth | Do not press hard objects into the foam |
| Removable padding | Wash by hand in cold or lukewarm water only as instructed | Reinstall only once completely dry |
| Fixed padding | Dab with a small amount of soapy water, then absorb the moisture | Do not fully submerge the helmet |
| Straps and buckle | Wipe with a damp cloth; remove soap residue with a clean cloth | Do not twist, heat, or treat with chemicals |
| Visor and electronics | Follow only the model-specific manufacturer’s instructions | Protect the coating, seal, and contacts |
Clean the outer shell and ventilation openings
First moisten dried-on residue with a wet, soft cloth for a few minutes without soaking the helmet. Then wipe over the shell with light pressure. Repeat the process instead of scrubbing harder. Insect residue on edges and around ventilation openings can be loosened with the tip of a soft cloth. A screwdriver or knife can damage the shell and impact-absorbing foam.
Finally, go over the surface with a second cloth moistened only with clean water. This leaves as little cleaning-product residue as possible. In good light, also check for cracks, deep gouges, delamination, dents, or deformed foam. Cleaning can make damage visible, but cannot repair it.
Do not remove stickers or adhesive residue with universal solvent. ABUS advises against stickers because the solvents they contain can impair materials. For unknown residue, ask the helmet manufacturer for an approved procedure.
How to wash interior padding properly
If the comfort padding is removable according to the instructions, slowly detach it at the designated attachment points. Do not tear at thin fabric edges or pry any hook-and-loop fasteners out of the helmet shell. uvex recommends lukewarm soapy water and air-drying for removed interior padding; its own FAQ specifies mild detergent at 30 degrees for certain comfort pads. This is not a universal machine-washing temperature: the instructions for your model remain authoritative.
Hand-wash the padding, gently squeeze it out, and rinse out cleaning products with clean water. Do not wring it out. Lay it flat on a clean towel and allow it to air-dry completely. ABUS warns against using a hair dryer or tumble dryer because heat can damage materials. Direct sunlight, radiators, and a car's rear parcel shelf are also unsuitable.

Permanently installed padding should be dabbed sparingly. Use as little moisture as possible and ensure air circulation. A helmet with a still-damp interior should not be worn or placed in a closed bag.
Caring for straps, buckle, and adjustment system
Straps absorb a lot of sweat, but must not lose their routing or length. Wipe them section by section with a mild soap solution and remove residue with clean water. Do not pull the straps through edges that the instructions say cannot be removed. Do not mark their position with a solvent-based pen or adhesive tape.
At the buckle, remove visible dirt with a damp cloth. Check that both parts close without force and can be reopened using the designated button. Oil or silicone spray on the buckle is not a general maintenance measure. A buckle that sticks, is cracked, or does not close reliably should be handled by the manufacturer or a specialist retailer.
Turn the rear adjustment system only within its normal range. If it clicks, skips, or fails to hold the set width, do not try to “flush it out” with cleaner. Some systems are replaceable; others are part of the helmet. The model instructions clarify this.
Visor, light, and special surfaces
Visors may have coatings that are sensitive to unsuitable cleaners or dry rubbing. Remove a visor only if the instructions describe the procedure, and use the approved product specified there. The fact that the helmet shell tolerates mild soapy water does not automatically mean that the same method should be used for every visor.
For a helmet with an integrated light, battery, remote control, or speaker, check the product-specific instructions before cleaning. Switch off electronic functions and keep charging ports dry unless the manufacturer specifies otherwise. Do not open a damaged housing or faulty electronics.
Drying and reassembling
Place the helmet in a well-ventilated, shaded location at room temperature. It should rest securely and not be hung by the straps. A hair dryer, tumble dryer, radiator, and direct sunlight speed up drying but may put stress on materials or adhesive bonds. Therefore, plan the cleaning so that there is enough time before your next ride.
Using the previous photo as a guide, attach completely dry pads to their designated points. Check that they lie flat and do not block any ventilation opening or the adjustment system. Route twisted straps correctly and test the buckle and size adjustment. Then put on the helmet and check the fit again; cleaned or newly reinstalled pads may sit differently.
Cleaning is not a repair
Cracks, dents, deep gouges, detached foam, damaged straps, or a defective buckle are not glued, sewn, or repaired with replacement parts from another model. ABUS recommends replacement if there is visible damage. After a fall, there may also be damage that cannot be reliably assessed from the outside. In that case, follow the manufacturer's replacement and inspection instructions.
Even heavily worn pads are replaced only with compatible original or approved parts. Additional foam changes the fit. A freshly cleaned helmet is ready for use only when the shell, internal structure, strap routing, buckle, and adjustment system are intact.
How often should a bicycle helmet be cleaned?
A fixed schedule is not suitable for every type of use. After a sweaty ride, heavy dust, or visible insect residue, prompt, gentle cleaning is advisable. In everyday use, it is often enough to let the helmet air-dry after the ride and remove dirt before it dries on. Frequent soaking or unnecessarily vigorous washing is not better care.
Store the dry helmet in a cool, dry place protected from direct sunlight. uvex considers the parcel shelf in a car unsuitable because of exposure to sunlight and heat. A closed, damp bag promotes odors and mold; a breathable bag is more suitable for a dry helmet.
Frequently asked questions about cleaning bicycle helmets
Can a bicycle helmet go in the dishwasher?
No. Heat, cleaning products, and water jets are not intended for the entire helmet. Clean the shell and rigid parts by hand according to the manufacturer's instructions.
Can the padding go in the washing machine?
Only if the instructions for the specific helmet expressly permit it. Many manufacturers recommend hand washing; stated temperature limits do not automatically apply to other models.
How do I get sweat odor out of the straps?
Wipe them with mild soapy water, remove any soap residue, and allow them to air-dry completely. Perfume, disinfectant spray, and solvents can irritate materials or skin and are not generally recommended.
Can I wear the helmet immediately after cleaning?
Only once the padding and straps are completely dry, correctly fitted, and all functions have been checked. The helmet must then fit properly again and close securely.
Conclusion: Minimal chemicals, minimal heat, thorough visual inspection
The safest way to clean a bicycle helmet is with lukewarm water, mild soapy water, and a soft cloth. Wash removable padding only according to the model instructions, gently wipe the straps and buckle, and allow all parts to air-dry. Use the opportunity to check thoroughly for damage. Cleaning maintains hygiene and comfort, but it does not replace a damaged helmet.
As of: September 6, 2026. Cleaning products, removable parts, temperature, and handling of the visor or electronics depend on the current instructions for the specific helmet model.
Share:
E-bike motor making noises: safely narrow down the pattern
Bicycle gear cable snapped: respond safely and identify the cause