

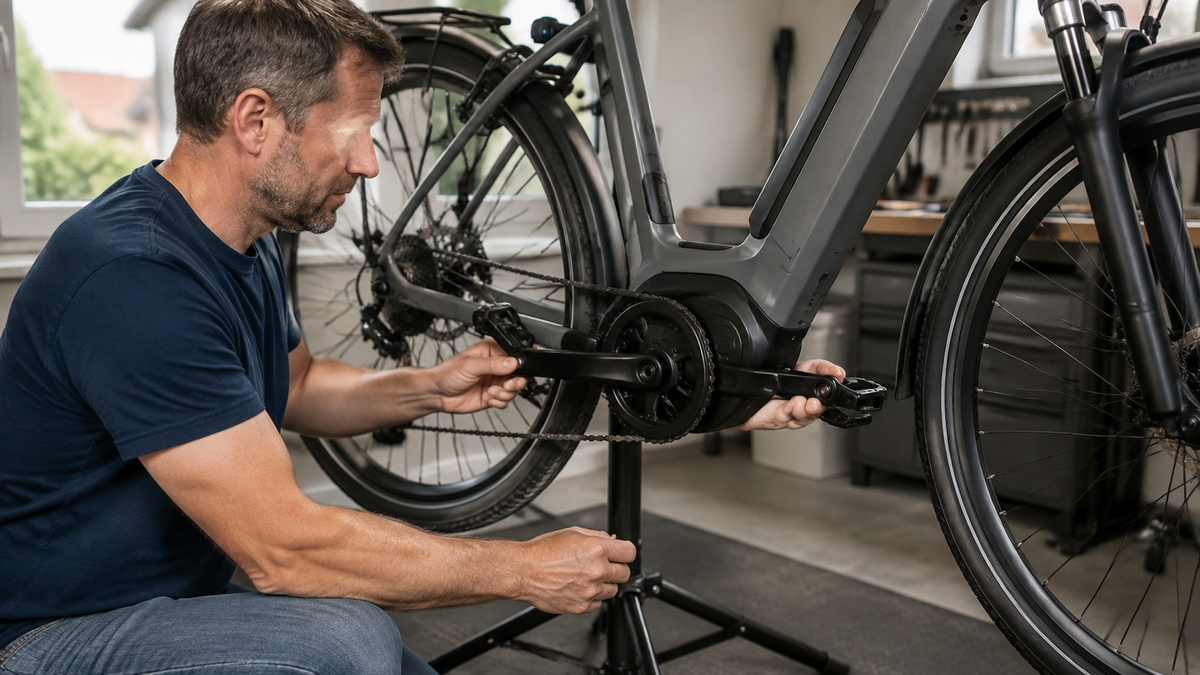
A loose bicycle crank is not a noise problem that should be ignored until the next inspection. Noticeable play can originate at the pedal, at the connection between the crank arm and spindle, or in the bottom bracket. Continuing to ride with a loose crank can damage contact surfaces and fasteners; in the worst case, the foot may lose its stable support at an inopportune moment. Therefore: stop applying load, locate the movement precisely, and do not simply tighten some random bolt.
Stop first if there is play or creaking
Take pressure off the pedals and roll in a controlled manner to a safe place. If the crank arm is visibly crooked, can be moved sideways, or is coming away from the spindle, do not ride any further. Switch off an e-bike and avoid any motor test while it is on a repair stand. A loose crank can move further more quickly under the additional drive load.
First, check only while the bike is stationary. Position it so it cannot tip over, and wear gloves. After a fall, a hard pedal strike, or recent installation work, the threshold for taking it to a workshop should be especially low. Visible cracks, deformed parts, missing bolts, or metallic abrasion mean: do not retighten anything; have the components professionally inspected.
Distinguish between the pedal, crank arm, and bottom bracket
| Movement | Likely area | Next step |
|---|---|---|
| Only the pedal body tilts around its axle | Pedal bearings or pedal axle | Do not confuse pedal play with crank play; have it checked separately |
| One crank arm moves on the spindle | Crank attachment or contact surface | Do not ride any further; determine the system and possible damage |
| Both cranks move sideways together | Bottom bracket, bearings, or spindle | Compare with the diagnosis in bottom bracket play |
| No play, but creaking only under load | Multiple contact points possible | Do not blame the crank prematurely; check systematically |
| Crack, severe deformation, or visible abrasion | Structural or advanced damage | End the ride and contact a specialist workshop |
A calm test without riding load
Hold one crank arm near the pedal axle and move it sideways relative to the direction of travel using little force. Observe whether only the pedal, the individual arm, or the entire spindle moves with it. Repeat the comparison on the other side. Then slowly turn the cranks by hand. Note any rubbing, detents, or lateral movement, but do not provoke them by shaking forcefully.
In its user documentation, Shimano lists loose components, unusual noises, cracks in the crank arms, and abnormalities while pedaling as items to check before riding. If there are problems, professional assistance should be sought. This external check does not replace inspection of the internal splines or a bearing diagnosis; it merely helps provide the specialist with a clear observation.
Why there is no universal tightening procedure
Cranks can be mounted on square-taper, splined, or integrated spindles. Some systems use a central bolt, while others use a preload cap plus clamp bolts or a completely different securing method. The tightening sequence, torque, lubrication, and reusability of the components vary. Therefore, a figure from a video or from a similar-looking crank must not be applied.
Even with two clamp bolts, “make both as tight as possible” is not a method. Shimano specifies for certain Hollowtech II cranks that the bolts be tightened gradually and alternately, together with a defined securing plate. This is a model-specific specification, not an instruction for all cranks. Find the exact model number and use only the corresponding manufacturer documentation.

Further tightening can conceal existing damage
If a crank arm has moved on a form-fitting mount, the edges, splines, or contact surface may already be worn out. A bolt may initially feel tight even though the connection will move again under load. Further tightening will not repair lost material and may additionally overload the threads or clamp.
Especially when a crank repeatedly comes loose, the cause is no longer simply “not tight enough.” Possible causes include incorrect assembly, missing securing components, damaged mating surfaces, an unsuitable combination of parts, or a problem with the spindle or bearings. Do not mark the position with paint on a visible branded surface; instead, photograph the condition and have the connection assessed after disassembly.
What you can check from the outside
- Are the crank arms, fasteners, and securing components visibly complete?
- Is the pedal straight in the crank thread, with play only in the pedal body?
- Is there a gap, abrasion, crack, or conspicuous misalignment at the connection to the spindle?
- Do both cranks move together, or only one arm?
- Did the problem occur directly after transport, workshop work, or an impact?
For this check, do not remove any covers whose removal is not предусмотрена in the user manual. Do not turn any adjustment or fastening parts without a clear reason. On an e-bike, do not open the motor cover either. The crank may be part of a system-critical connection to the drive.
If the manufacturer’s instructions allow a user check
Only when the system, fastener, and procedure are clearly identified may a check expressly intended for that system be carried out. Use a suitable, calibrated tool and the specified value, sequence, and thread condition. The guide How to use a torque wrench correctly on a bicycle explains why the range, attachment, and manufacturer’s specification must match.
Stop if the bolt spins freely, the tool does not seat properly, a part is missing, or the specified torque cannot be clearly assigned to the specific model. After merely retightening it as a check, do not continue riding if there was significant play beforehand. Only a new check confirming that there is no play and, if necessary, an inspection of the mating surfaces can clarify the condition.
Avoid common mistakes
A long lever, threadlocker of unknown specification, or high torque applied “by feel” are not safe shortcuts. Nor does it help to address only the visible outer bolt when the system has a preload or multiple clamping points. Grease or assembly paste should not be used indiscriminately; some contact surfaces require a specific condition, while others explicitly require a lubricant.
Also, do not confuse a creaking pedal, a loose chainring bolt, saddle noises, or bottom bracket play with a loose crank arm. Noises travel through the frame. What matters is reproducible movement directly at the component, not just the direction the creaking seems to come from while riding.
Information the workshop needs
Document the bicycle and crank model, affected side, type of movement, and when it first occurred. Mention any recent installation work, crash, or pedal strike, as well as any attempts to retighten it. A short video of the stationary bicycle can show which parts move together. Rotate the crank slowly, keeping your hands away from the chain and chainring.
Depending on the system, the workshop inspects the fastener, threads, retention mechanism, crank interface, spindle, and bearings. It determines whether correctly reinstalling the crank is sufficient or whether damaged parts must be replaced. A crank that repeatedly comes loose always warrants this investigation into the cause, even if it initially seems secure after briefly tightening it.
Frequently asked questions about a loose bicycle crank
Can I still ride home with a slightly loose crank?
Noticeable play in the crank arm can further damage the mating surfaces and make your footing unsafe. Push the bike or arrange transport instead of testing the connection under load.
Is lateral play always caused by the bottom bracket?
No. If only one arm moves on the spindle, the problem is more likely to be with its fastening. If both cranks move together, the bearing assembly becomes the focus. A professional inspection can distinguish between these cases.
What torque does the crank bolt require?
There is no universal value. It depends on the crank model, fastening system, and bolt. Use only the applicable manufacturer's specification.
Why does the crank become loose again after tightening?
Possible causes include damaged mating surfaces, missing retention, incorrect installation, or incompatible parts. Repeatedly tightening the fastener without inspecting the disassembled parts can make the damage worse.
Conclusion: Locate the movement and protect the connection
If a bicycle crank is loose, stop applying force and distinguish between pedal play, movement of a single crank arm, and movement of the bottom bracket as a whole. Because crank fasteners vary considerably, only the instructions and torque values for the specific system apply. Visible damage, recurring play, or an unknown connection should be inspected by a workshop. This protects the spindle, crank, and, above all, your secure footing on the pedal.
As of: September 6, 2026. The assembly, securing method, tightening sequence, and torque of a crank connection are model-specific; professional dealer documentation is not a general DIY guide.
Share:
Bicycle tire not seated correctly: Check the bead and rim seat
E-bike display won’t turn on: Check the external power supply