

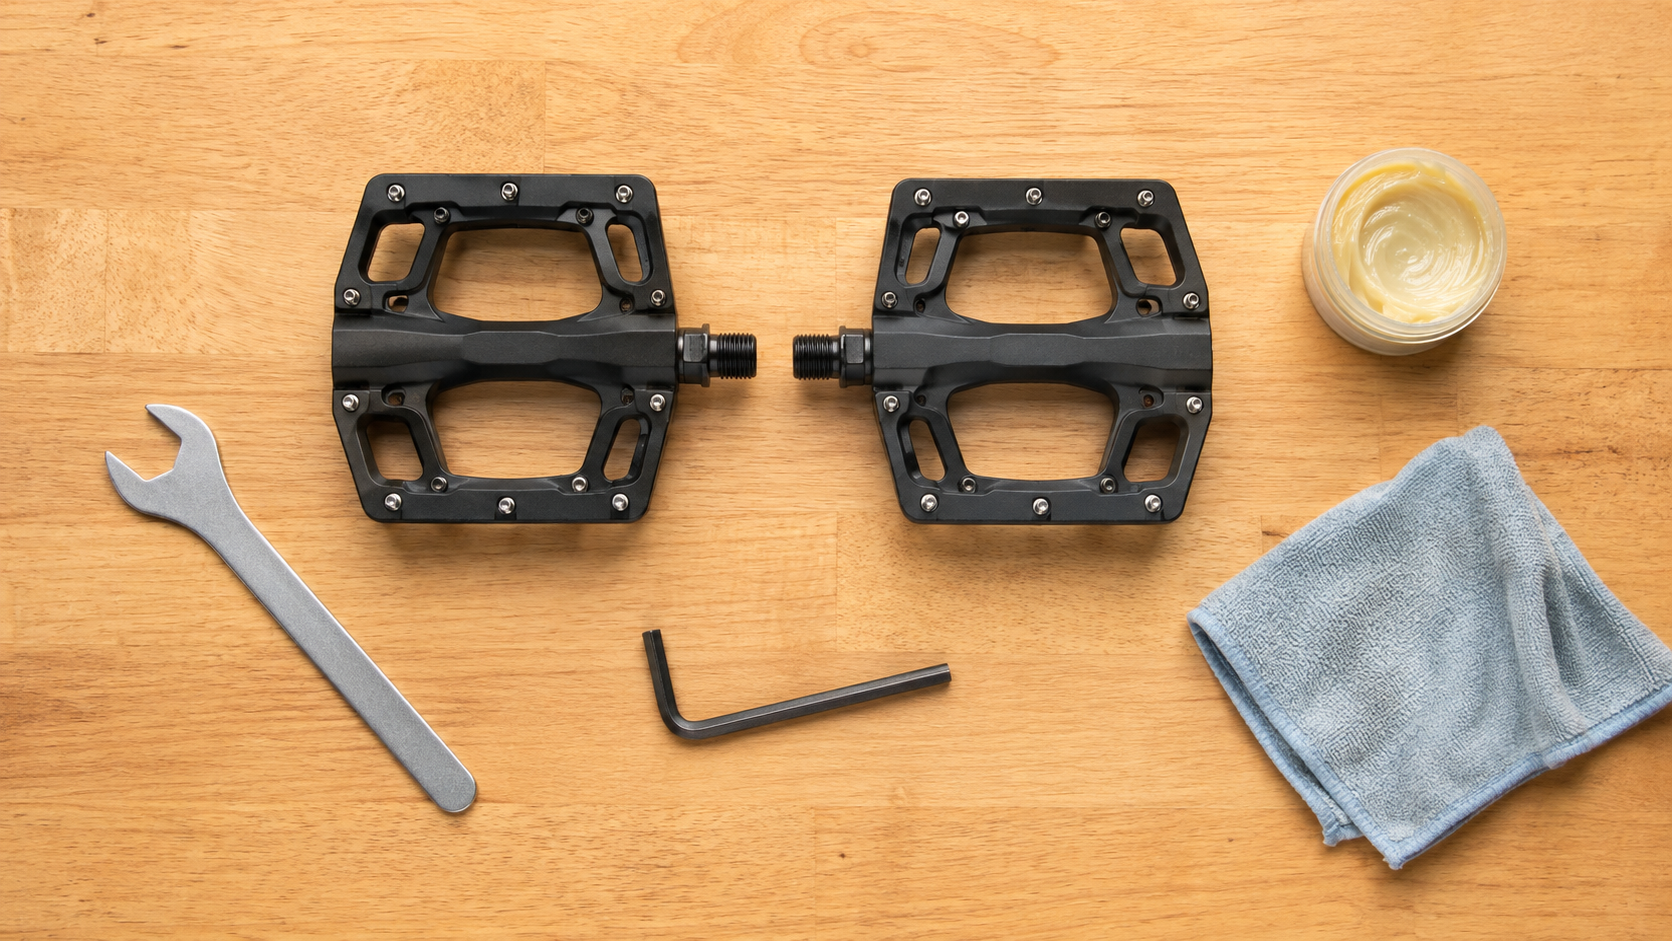
Changing bicycle pedals is generally a manageable task. However, the critical point is the different thread direction: the right side has a right-hand thread, while the left side has a left-hand thread. If you confuse the side, direction of rotation, or tool, you can permanently damage the crank thread. Therefore, first check the instructions for the pedal and crank, work without force, and tighten the new pedals exclusively to the torque specified there.
Tools and preparation
| What you need | What it is for | What to look out for |
|---|---|---|
| Suitable pedal wrench or hex key | Removing old pedals and installing new ones | Depending on the pedal, usually a 15 mm wrench or hex key; check the size on the component |
| Suitable torque wrench with the correct bit | Tightening the connection under controlled torque | The measurement range and direction of rotation must be suitable for the task |
| Clean cloth and soft brush | Cleaning threads and contact surfaces | Do not push metal filings into the crank thread |
| Grease or assembly paste approved by the manufacturer | Preparing the pedal threads | Do not use just any product; follow the material and manufacturer instructions |
| Instructions for the bicycle, crank, and pedal | Checking torque, washers, and installation procedure | Component-specific specifications take precedence over general advice |
Switch off the e-bike and secure it against unintended activation. Place it securely on level ground. Remove a battery or display only if the relevant operating instructions require this for maintenance work. Wear sturdy shoes and keep your hands away from chainring teeth and the chain. A clean workspace makes it easier to identify the R and L markings.

Identifying the left and right sides clearly
The sides are always viewed in the direction of travel. The right pedal is on the drive side with the chainring. It has a standard right-hand thread: turn it counterclockwise to loosen it and clockwise to tighten it. The left pedal has a left-hand thread: it loosens clockwise and tightens counterclockwise. This assignment is confirmed both by the SHIMANO instructions for changing pedals and the SHIMANO dealer manual for selected platform pedals.
Nevertheless, do not rely solely on a mnemonic. Check the side marking engraved on the new pedal and consult the instructions. A model-specific torque value from another manual is not a general value for your bicycle.
Changing pedals step by step
- Check the tool interface: Some axles have external flats for a pedal wrench, while others are operated from the inside of the crank with a hex key. Use only a tool that fits completely.
- Loosen the old pedal in a controlled manner: Start by turning counterclockwise on the right and clockwise on the left. Position the crank and tool so that you can work steadily and do not hit the chainring when loosening the pedal.
- Stop if there is resistance: If the wrench slips, the tool interface becomes rounded, or the pedal does not move despite controlled force, stop. A longer lever is not an automatic solution. SHIMANO recommends taking stuck pedals to a specialist dealer if the normal method does not work.
- Check the threads: Clean both crank threads and the new pedal threads. Torn, misaligned, or heavily corroded threads belong in a workshop. Do not screw a new pedal into visibly damaged threads.
- Prepare for installation: Apply a thin layer of grease or assembly paste approved for the specific material combination. Use supplied washers only as specified in the instructions. SRAM/TIME also requires grease on the threads for its pedals; this does not replace the instructions for your model.
- Thread in by hand: Position R on the right and L on the left, keeping them straight. Turn several thread turns in using your fingers only. If you feel resistance immediately or the axle is at an angle, turn it back and start again. Never force the first thread with the wrench.
- Tighten to the specified value: Tighten each pedal to the torque specified in the current pedal or crank instructions. If the specifications conflict, clarify them with the manufacturer or a workshop instead of guessing an average value.
- Final check: Check that the pedals are secure, rotate freely, and have sufficient clearance from the crank and shoe. Then take a short, slow test ride away from traffic. If there is play, creaking, or uneven rotation, stop immediately.
These mistakes damage the pedal or crank
- Swapping left and right or turning both pedals in the same direction.
- Forcing an incorrectly aligned pedal into the soft crank thread with a tool.
- Applying an arbitrary torque value from the internet to a different crank.
- Working with a poorly fitting wrench until the tool interface or your hand slips.
- Ignoring the manufacturer's washers, assembly paste, or material instructions.
- Continuing to ride after installation despite play, rough bearing movement, or a damaged thread.
When is a bicycle workshop the better choice?
Go to a workshop if a pedal is seized, the tool interface is damaged, the crank thread shows filings or chips, or you do not have a suitable torque wrench. The same applies to carbon components, unusual applications, or unclear manufacturer specifications. Disassembling bearings, recutting threads, or installing a thread insert are not part of this simple replacement.
Frequently asked questions
Do I have to replace both pedals at the same time?
Not necessarily. However, the new pedal must match the intended side, use, shoe type, and crank. For clipless pedals, the system, cleats, and release adjustment must be checked together.
Why can't I thread the new pedal in by hand?
The side, angle, or thread is often incorrect. Stop immediately, clean the parts, and check them. If the resistance remains, do not try to overcome it with the wrench.
Can I install the pedals without a torque wrench?
If the manufacturer specifies a torque value, a suitable measuring tool is the safest solution. Without the right tool, have the installation completed by a workshop.

Share:
Baltic Coast Cycle Route: 1,128 km in 24 stages
Kocher-Jagst Cycle Route in 6 Days: Circular Tour Starting in Aalen